Curve Follow Project
You can make a robot follow curves in the 3D space using a Curve Follow Project (CFP). Curves in RoboDK can be selected from object edges or imported as a list of points in CSV files. A curve follow project is useful for some manufacturing operations such as robot welding, deburring, polishing, or painting for example.
To work with a CFP, Follow this procedure:
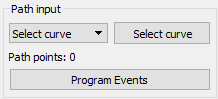
1.Click on Utilities➔Curve Follow Project to open the curve follow settings. These settings are the same as a Robot Machining Project, the only difference is that the Path input is preset to Select curve.
2.Click on the Select curve button to select the curve(s) on the screen.
3.Select the curves with a mouse left click. Selecting the same curve twice will swap the direction of motion. Also, right clicking a previously selected curve allows swapping the sense of motion or deselect a previously selected curve.
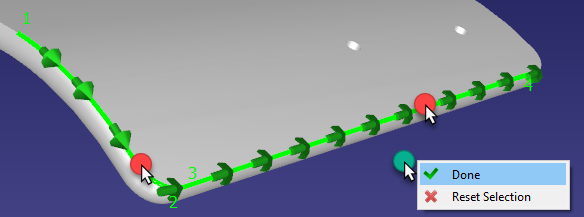
Right click on the 3D window and select Done or press the Esc key to go back to the settings menu. The green path will display the robot motion with respect to the object.
4.You can select Update to see if you can create a robot program with the default settings. If the program was generated successfully, you’ll see a green check mark. You can then select Simulate or double click the generated program to see the simulation start.
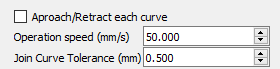
Additional options are available at the top right of the settings, such as the tool speed and if the approach/retract moves must be applied for each curve. The default settings are shown in the following image:
The program can be further customized and optimized using the same features as shown in the robot machining section.
Extract Features from 3D objects
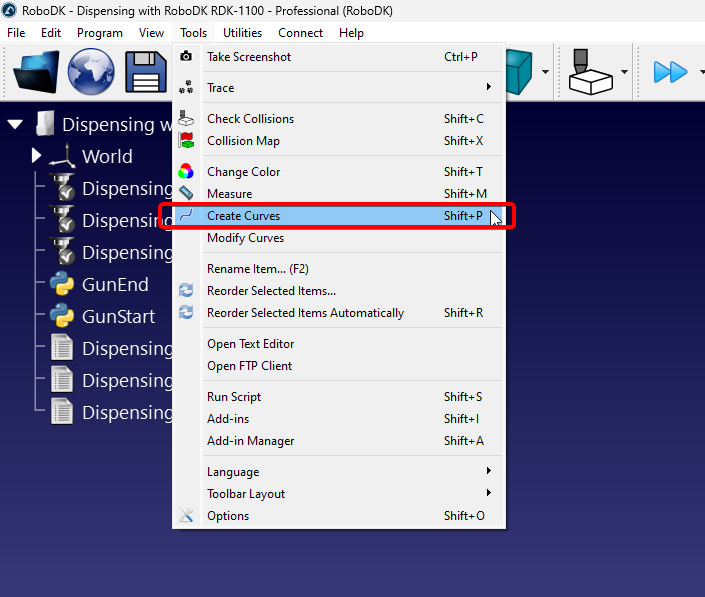
Curves can be extracted from the feature of 3D objects imported to RoboDK by selecting Tools➔Create Curves.
A panel will appear on the left side of the RoboDK Window, you will be able to extract curves as long as this panel is active and the “Auto extract curves” option is enabled.
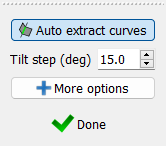
You can hover your cursor over the 3D object you want to extract the curve from. A thin and light blue line will appear to represent the curve. White arrows on different points represent the curve normal, this is the direction the tool will approach from.
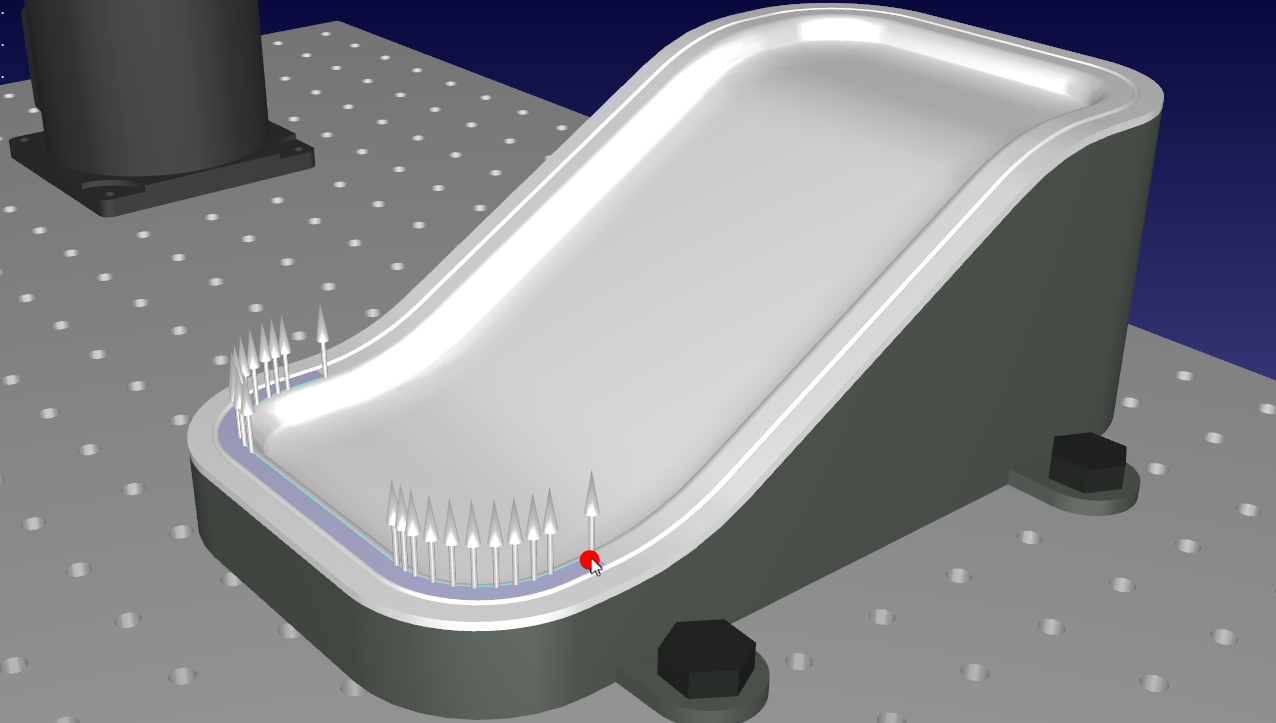
You can change the orientation of the curve normals (approach direction) by lightly shifting the mouse vertically or horizontally. The default step size is 15 degrees and is controlled by the “Tilt step (deg)” option on the Create Curve Panel.
When you have identified the right curve, click on it without shifting your mouse. Repeat until you have selected all the curves you want to use on a Curve Follow Project.
RoboDK includes different tools to help you modify curves even after extracting them. If you simply want to modify the normal, you can do it by going to Tools➔Modify Curves. This feature will allow you to change the normals on any previously created curve.
Import Curves
RoboDK can create or obtain curves from a variety of sources. The following list shows examples of tools that will create a curve that can be used in a Curve Follow Project:
a.Extract features from a 3D Object imported into RoboDK.
b.Import a CSV File containing the curve.
c. Import a curve using a CAD/CAM Plugin.
d.Import curves from a SVG or DXF File.
e.Using the Surface Pattern Generator App
f. Using the RoboDK API to integrate with external applications.
g.Using a hand probe such as RoboDK TwinTrack
Import a CSV file
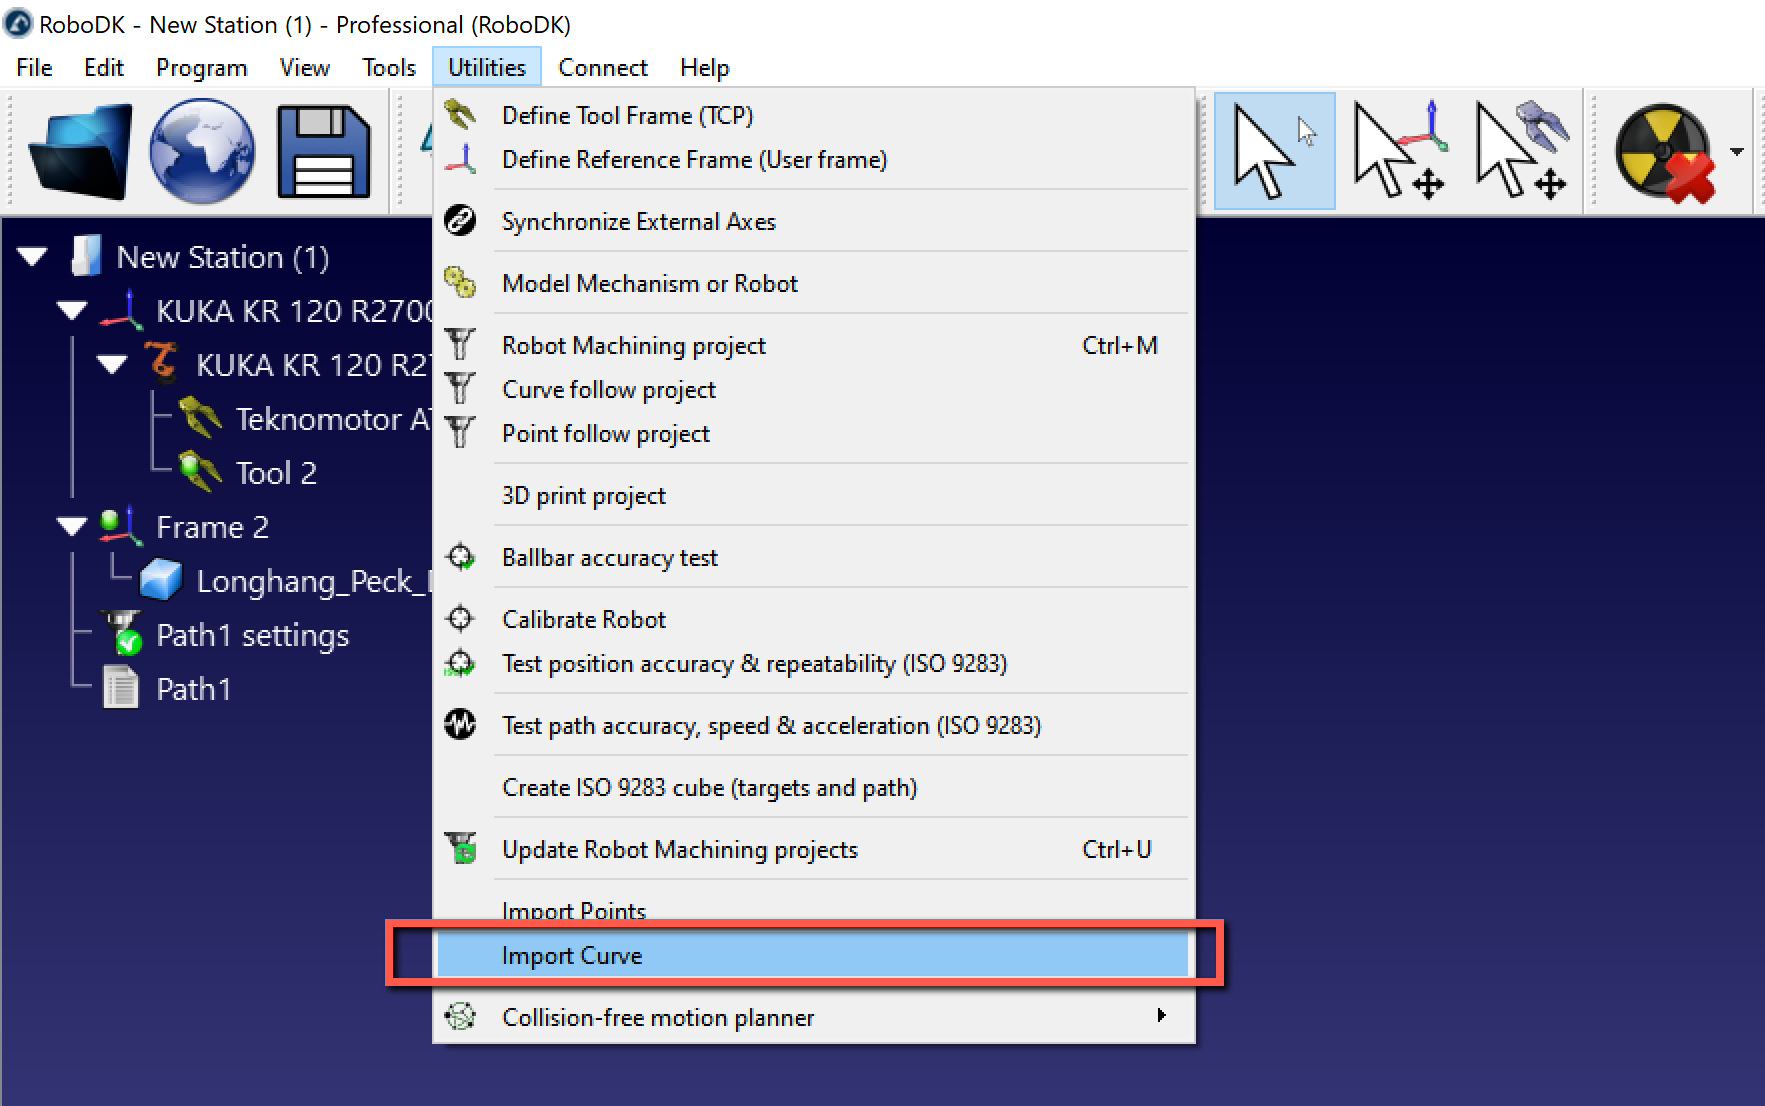
Curves can be imported in RoboDK from a CSV file or a text file by selecting Utilities➔Import Curve. A new item will appear in the station showing the curve as an object.
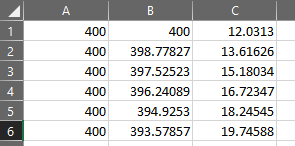
The file can be a text file with the 3D coordinates of each point of the curve. Optionally, the orientation of the Z axis of the tool can be provided as an i,j,k vector. All coordinates must be relative to the coordinate system of the part.
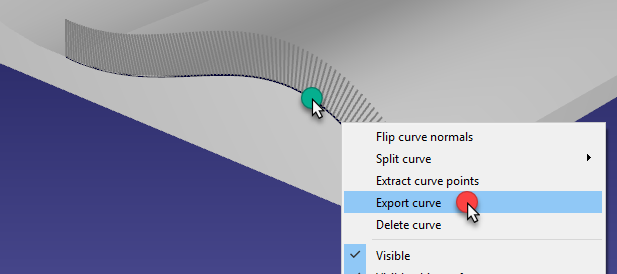
Optionally, existing curves of an object can be exported as a CSV file (right click a curve, then, select Export curve), modified and reimported back in RoboDK.
More information and examples on how to customize import of CSV or TXT files as curves or points is available in the examples section of the RoboDK API.