Navigation offcanvas
- Basic Guide
- Getting Started
- Interface
- Options Menu
- Robot Programs
- Robot Manufacturing
- Tips and Tricks
- Smaller/Larger References (-/+)
- Rename Object (F2)
- Show/Hide Robot Workspace (*)
- Open your last project or file (Ctrl+1)
- Show the Station Tree as a side window
- Show or Hide Objects (F7)
- Show or Hide the text on the screen (/)
- Move Reference Frames or Objects (Alt)
- Move a Robot Tool (Alt+Shift)
- Reorder Items in the Tree
- Reorder Items in the Tree without moving them
- Change the size of the Station Tree
- Teach a Robot Target (Ctrl+T)
- Modify a Robot Target (F3)
- Teach Robot Targets on a Surface
- Move Robot Targets on a Surface (Alt+Shift)
- Change the Robot Configuration
- Check the status of a Robot Program (F5)
- Faster Simulation (hold Spacebar)
- Generate a Robot Program (F6)
- Export a Simulation (Ctrl+E)
- Send a Program to the Robot (Ctrl+F6)
- Run the Program on the Robot
- Display the Robot Trace (Alt+T)
- General Tips
- Add-ins
- Add-ins
- File Manager
- Palletizing
- Computer Vision
- Display Panel
- OPC-UA
- Realistic Robot Simulation (RRS)
- Components Add-In
- Augmented Reality
- Welding Add-In
- RoboDK CNC
- IO Monitor Plugin
- Blender Export Add-in
- Plugins for CAD/CAM
- RoboDK Add-Ins for CAD/CAM Software
- RoboDK Plugin for BobCAD-CAM
- RoboDK Plugin for FeatureCAM
- RoboDK Add-In for Fusion 360
- RoboDK Plugin for hyperMILL
- RoboDK Add-In for Inventor
- RoboDK Plugin for Mastercam
- RoboDK Plugin for MecSoft
- RoboDK Add-In for Onshape
- RoboDK Add-In for Rhino
- RoboDK Add-In for Siemens Solid Edge
- RoboDK Add-In for SolidWorks
- Collision Detection
- Examples
- Robot Tips
- ABB robots
- Brooks robots
- Comau robots
- Denso robots
- Fanuc robots
- Han’s robots
- Hanwha robots
- JAKA robots
- KEBA Controllers
- KUKA robots
- Mecademic
- Yaskawa Motoman robots
- Omron-TM Robots
- Universal Robots
- Post Processors
- Virtual Reality
- RoboDK API
- Robot Drivers
- Accuracy
- RoboDK TwinTool
- RoboDK TwinTrack
- Robot Calibration (Laser Tracker)
- Robot Calibration (Optical CMM)
- Robot ballbar testing
- ISO9283 Performance Testing
When you open the main interface of the palletizing menu, you can choose between palletize, depalletize, or process setup (which includes both).
Follow these steps to set up your palletizing project:
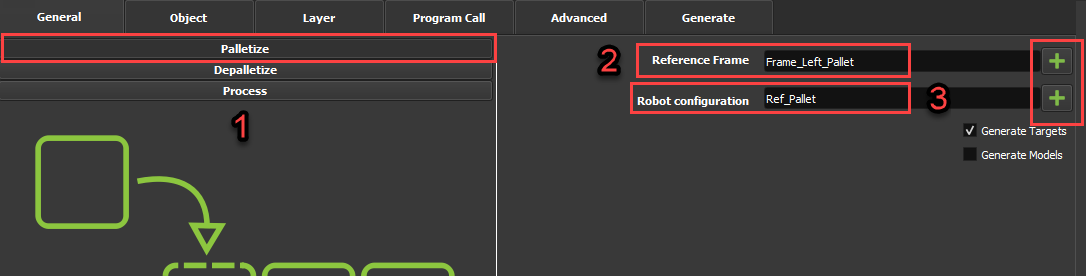
1.Select the "Palletize” option, click on the “+” button of “Reference Frame” and select your pallet reference frame. Then, click on the “+” button of “Robot Configuration” and choose the “Ref_Pallet” target we created earlier.
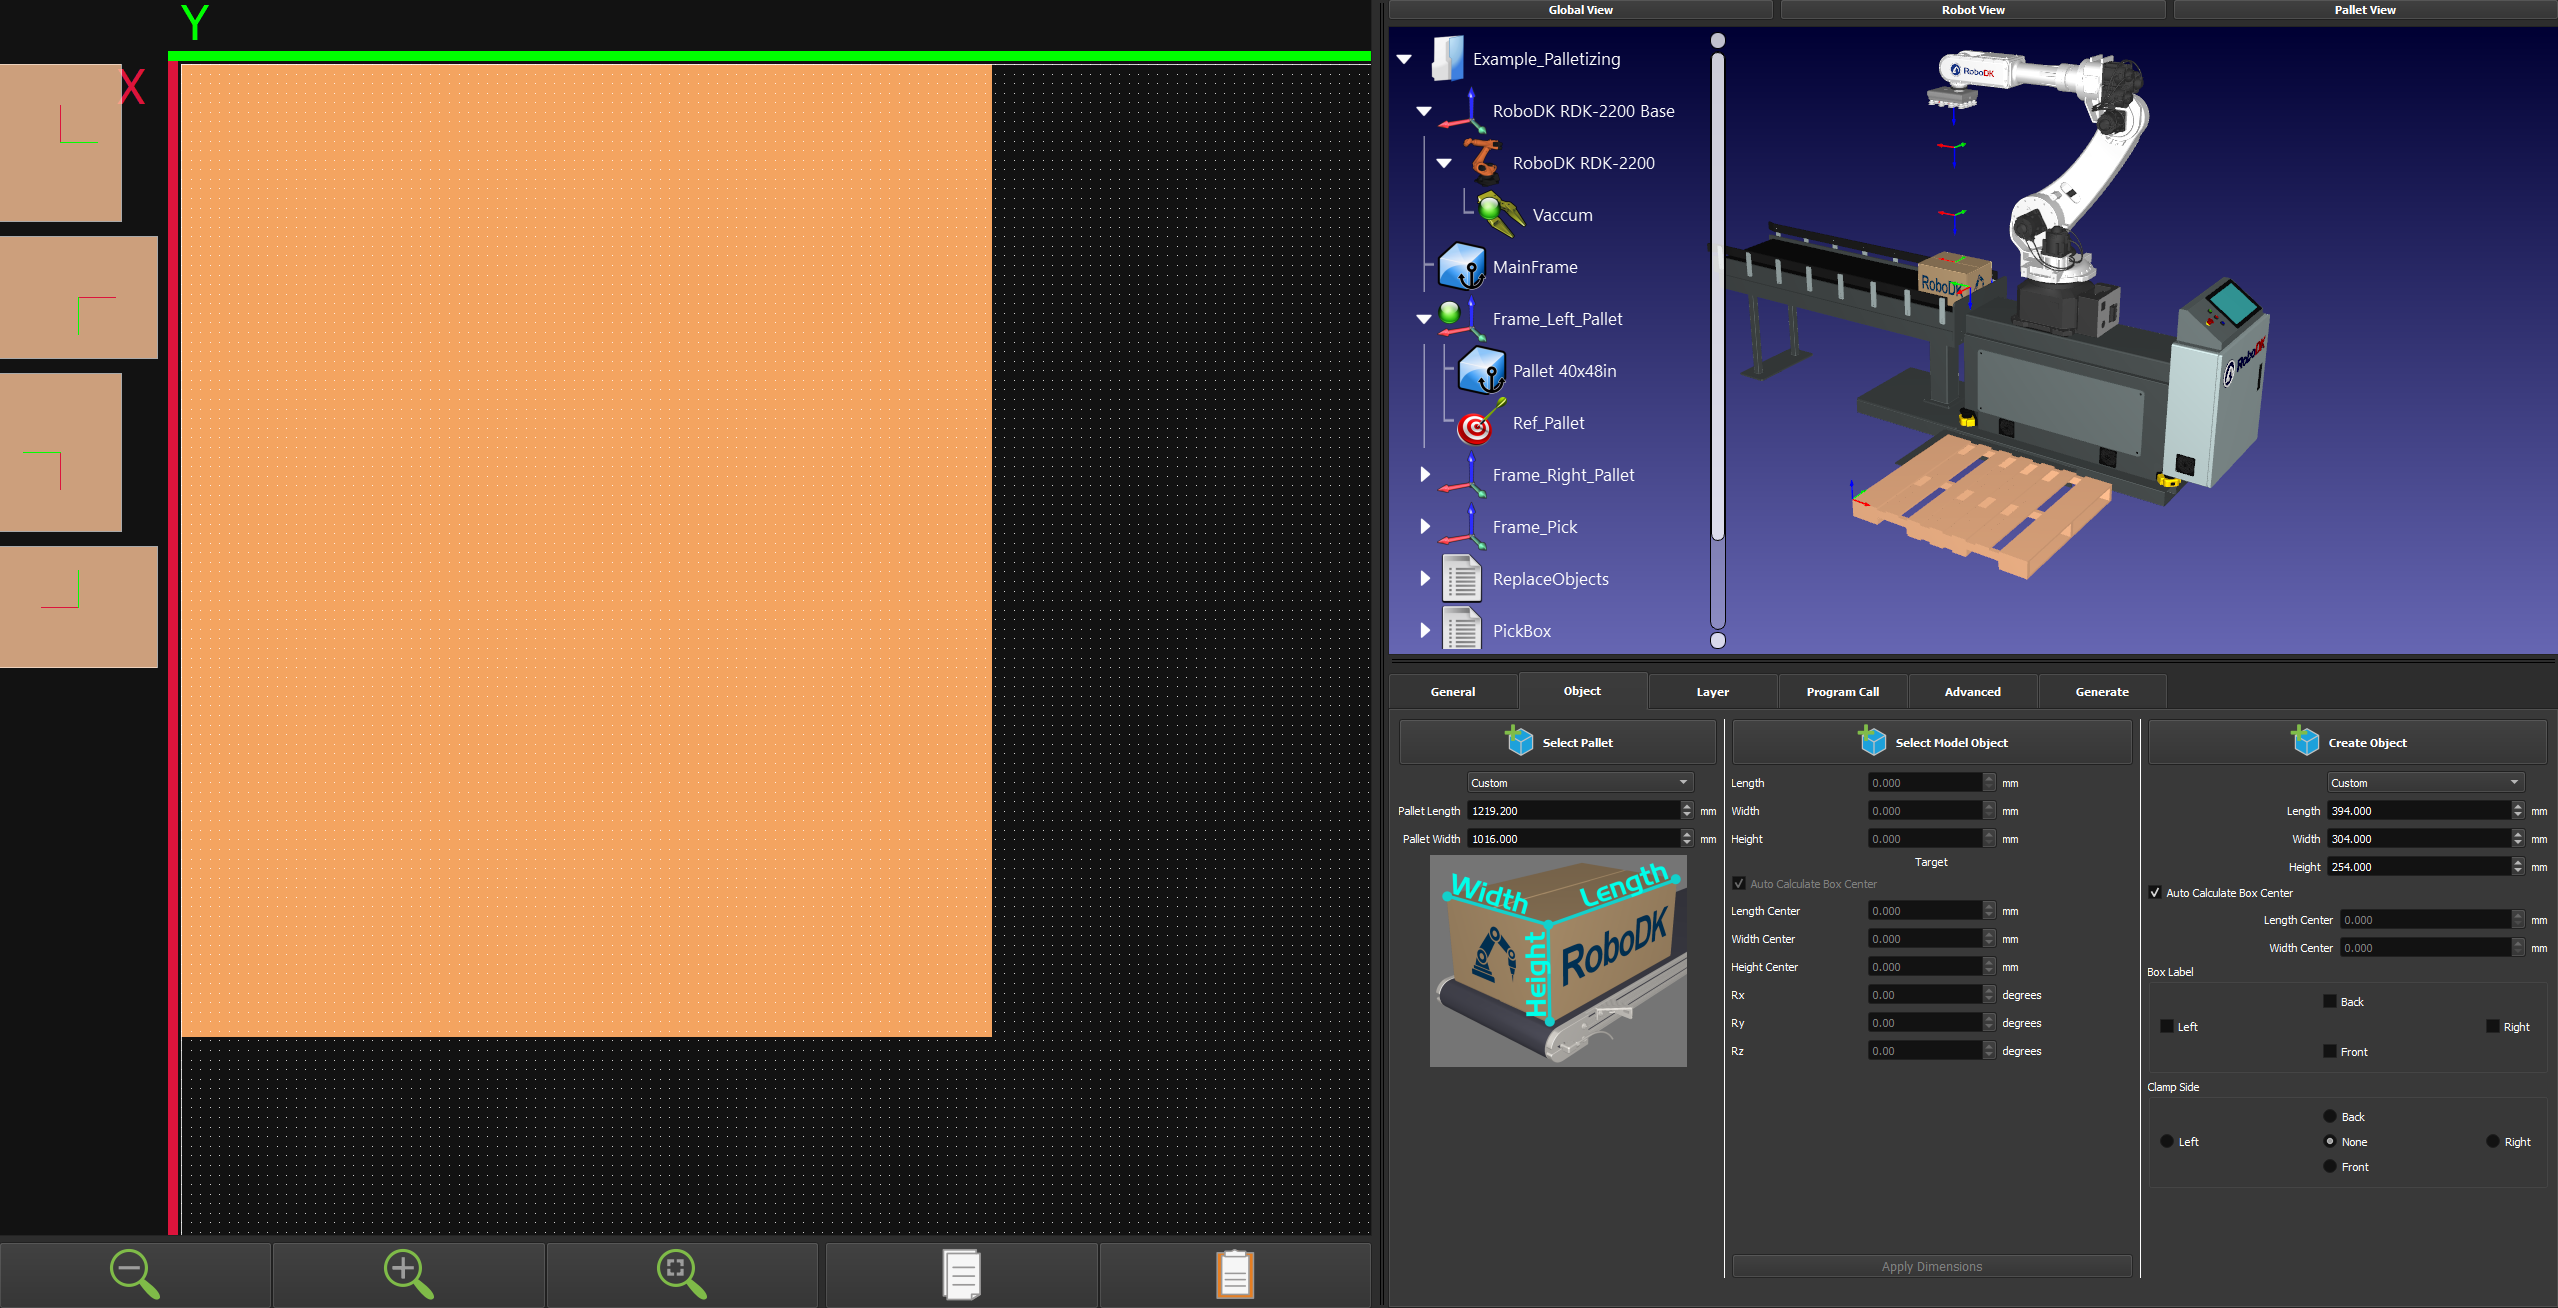
2.Select the Object tab to set up your pallet and box dimensions.
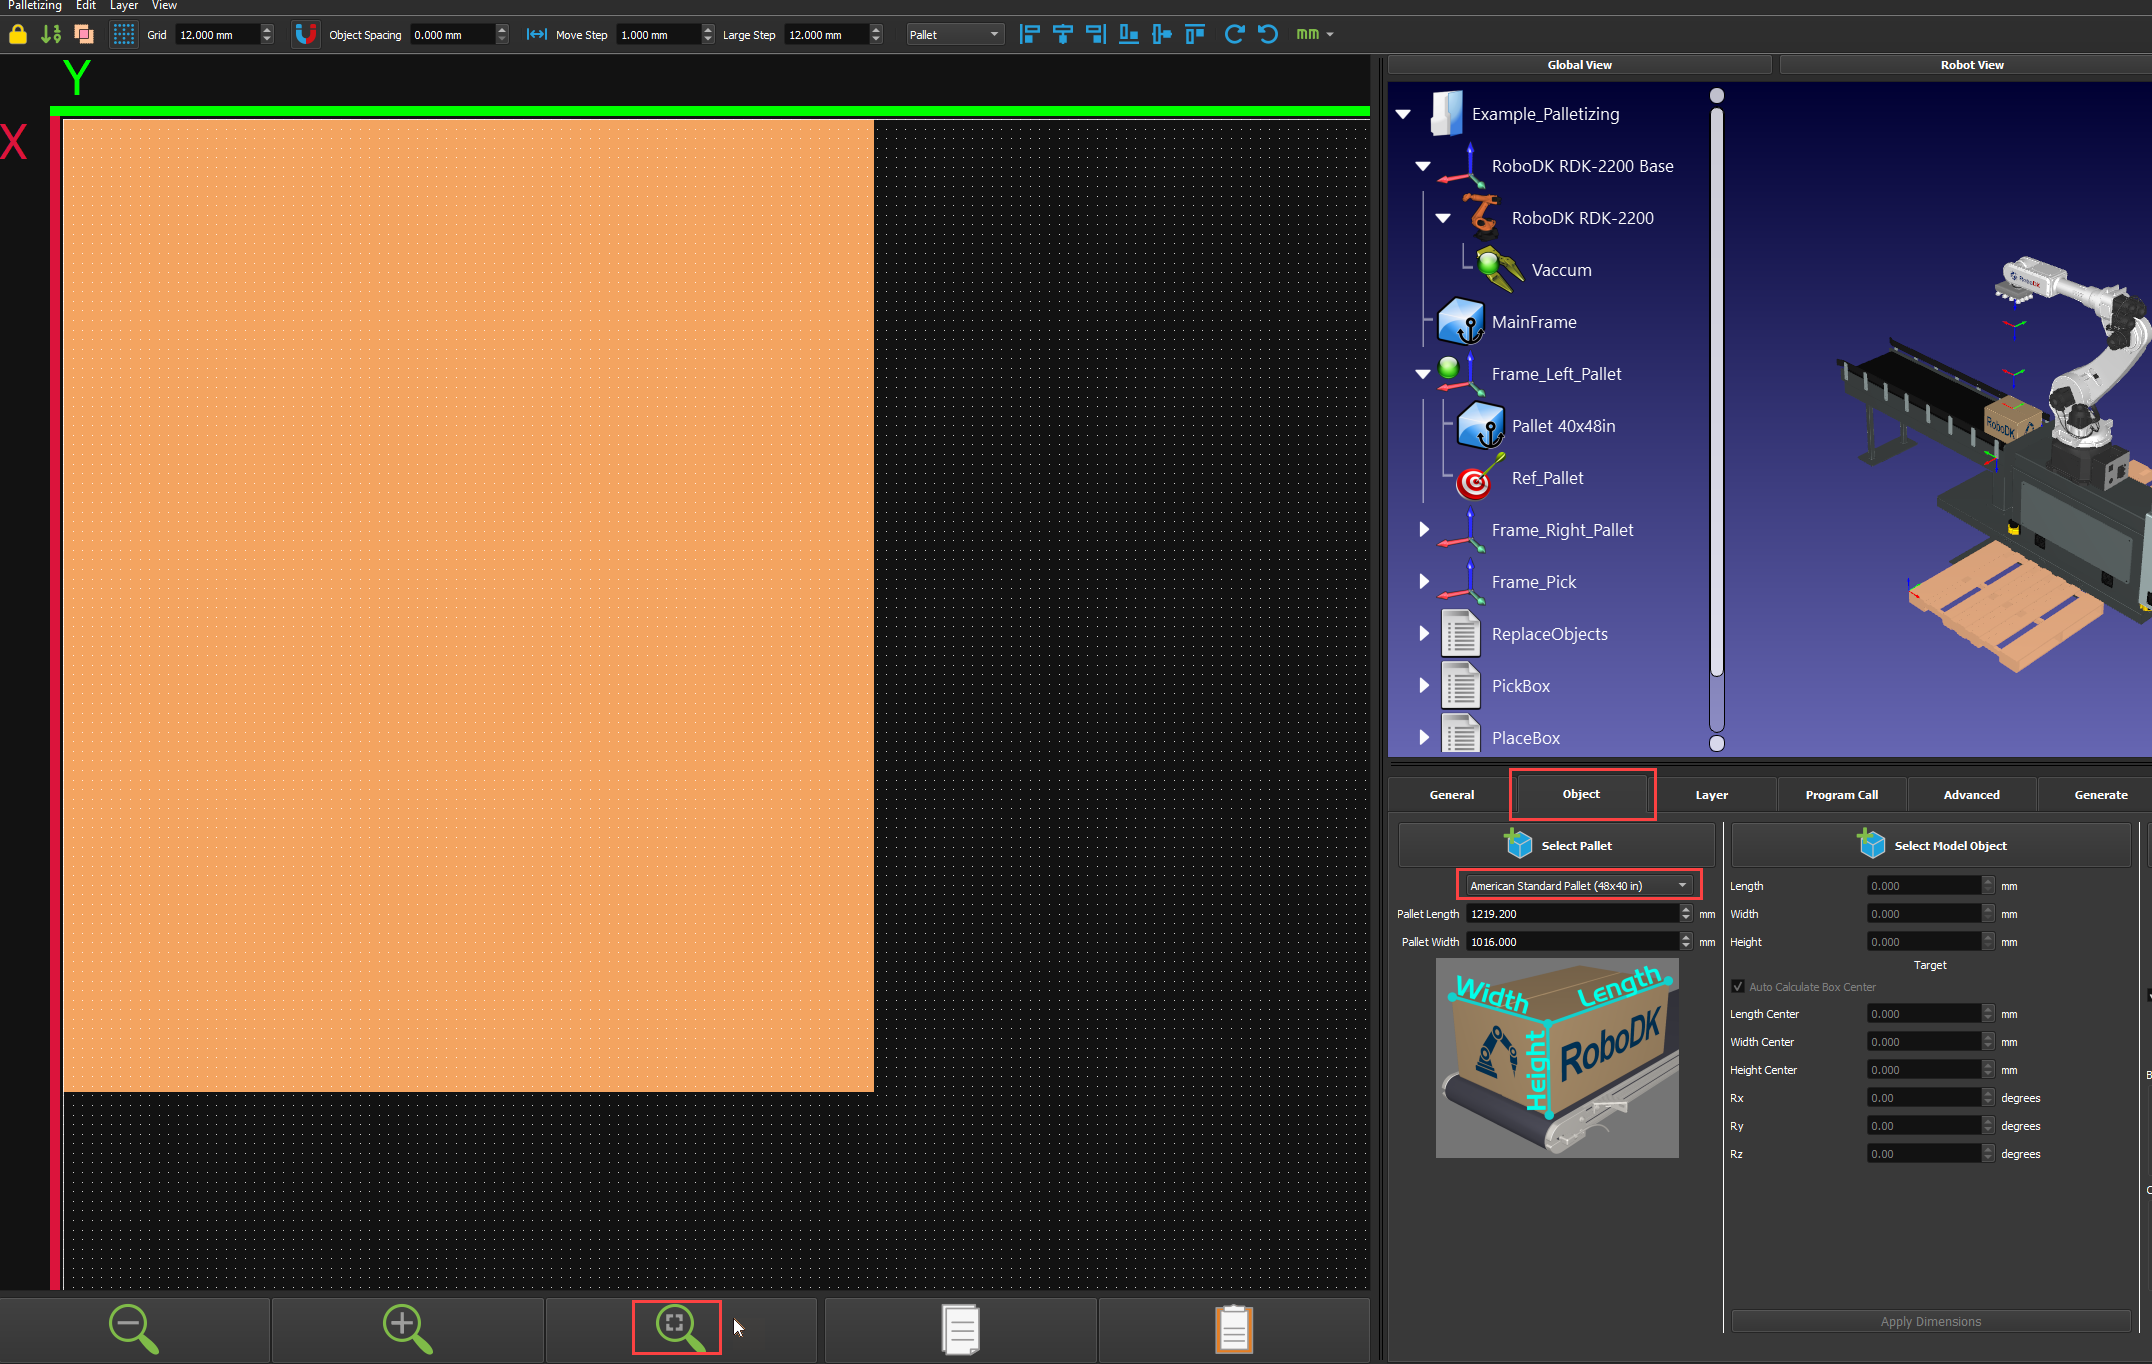
3.Select one of the presets for your pallet dimensions or enter its dimensions manually. Then click on the “Zoom to fit” icon so the 2D pallet can be properly shown in its entirety.
4.Select one of the presets for your box or enter its dimensions manually and click on “Create object”.
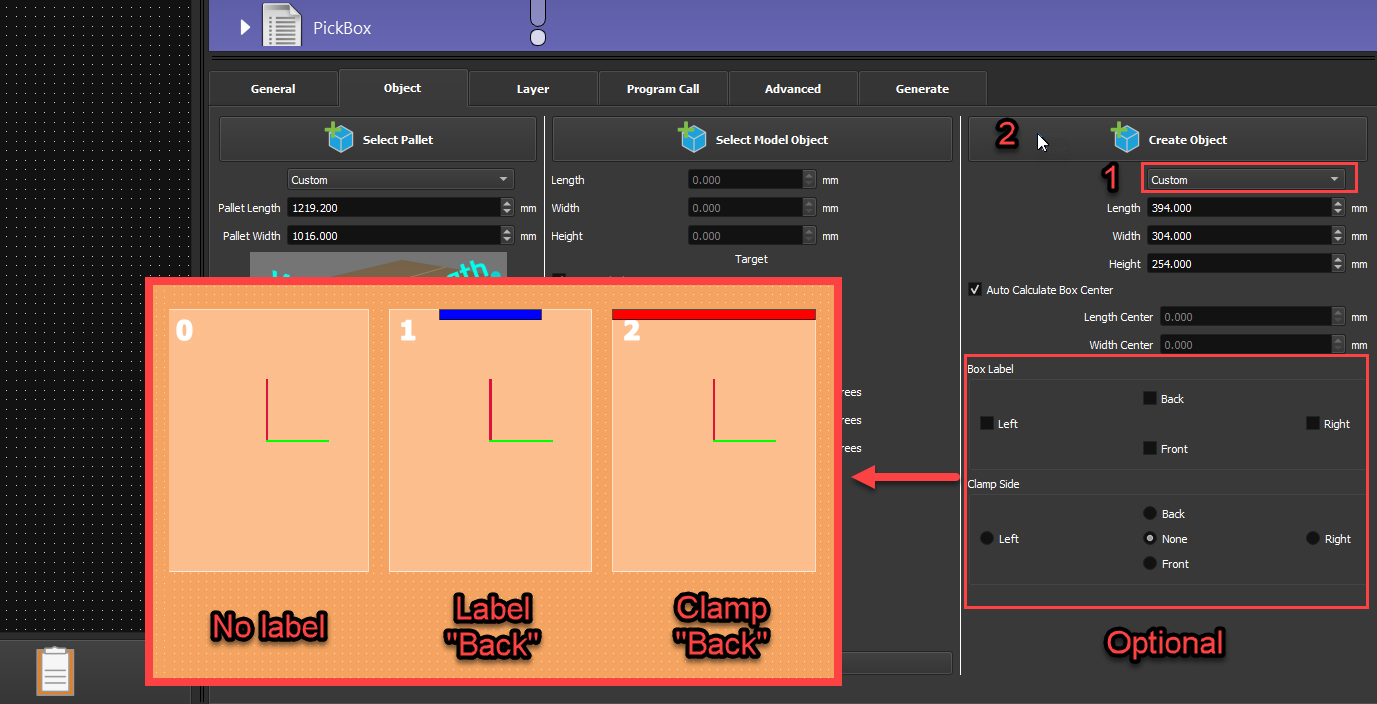
5.Once you’ve clicked on Create object, 4 boxes will appear on the left side of your screen. One box per possible 90-degree rotation. A red and a green line will show the rotation of the TCP around the Z axis.