Welding with Positionner
Introduction
This example will show you how to use RoboDK for tank welding simulation. This example includes a tank sample model and a robotic cell with an ABB welding robot paired with a single-axis positioner.
Robot welding example
To go through this robot welding project, you should first select the RoboDK robot welding with positioner example in the default library. Then you should select the welding paths in Fusion 360. Then you should adjust the robot path in RoboDK.
Model import
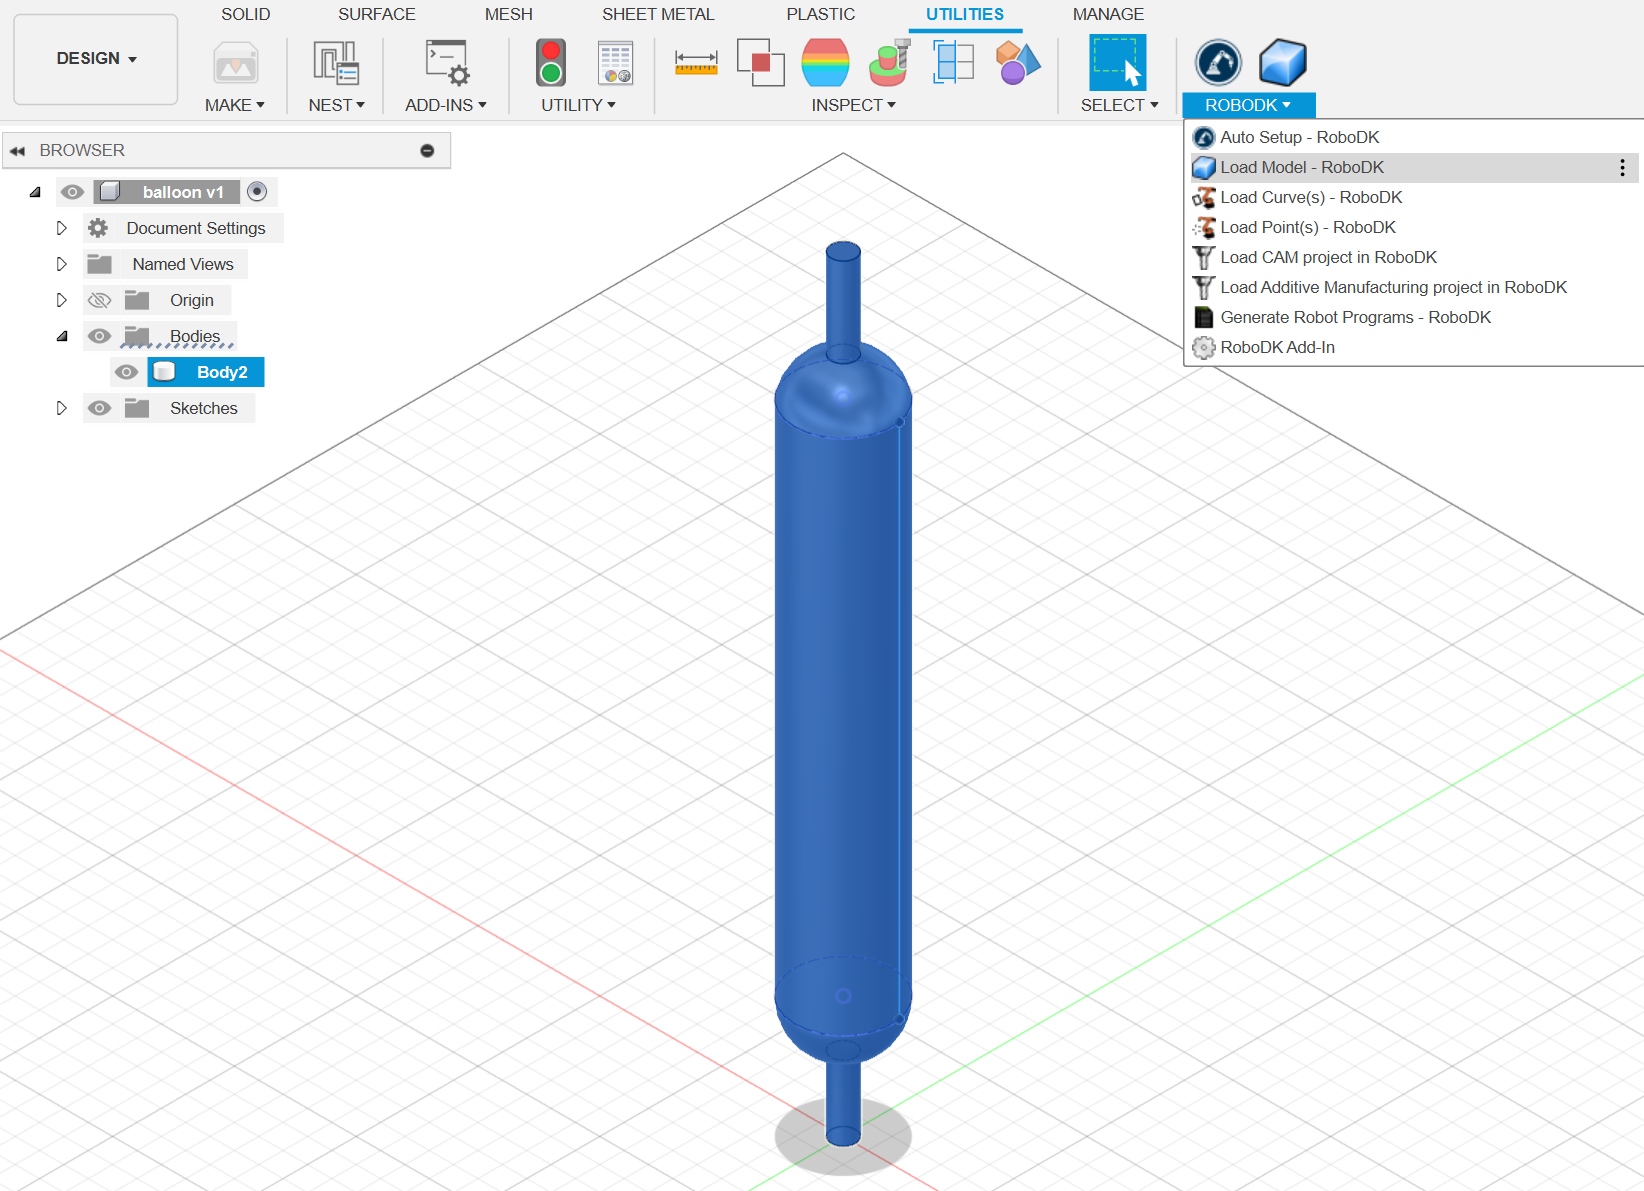
You should first import the part and the welding paths from Fusion 360.
Import the model from Fusion 360:
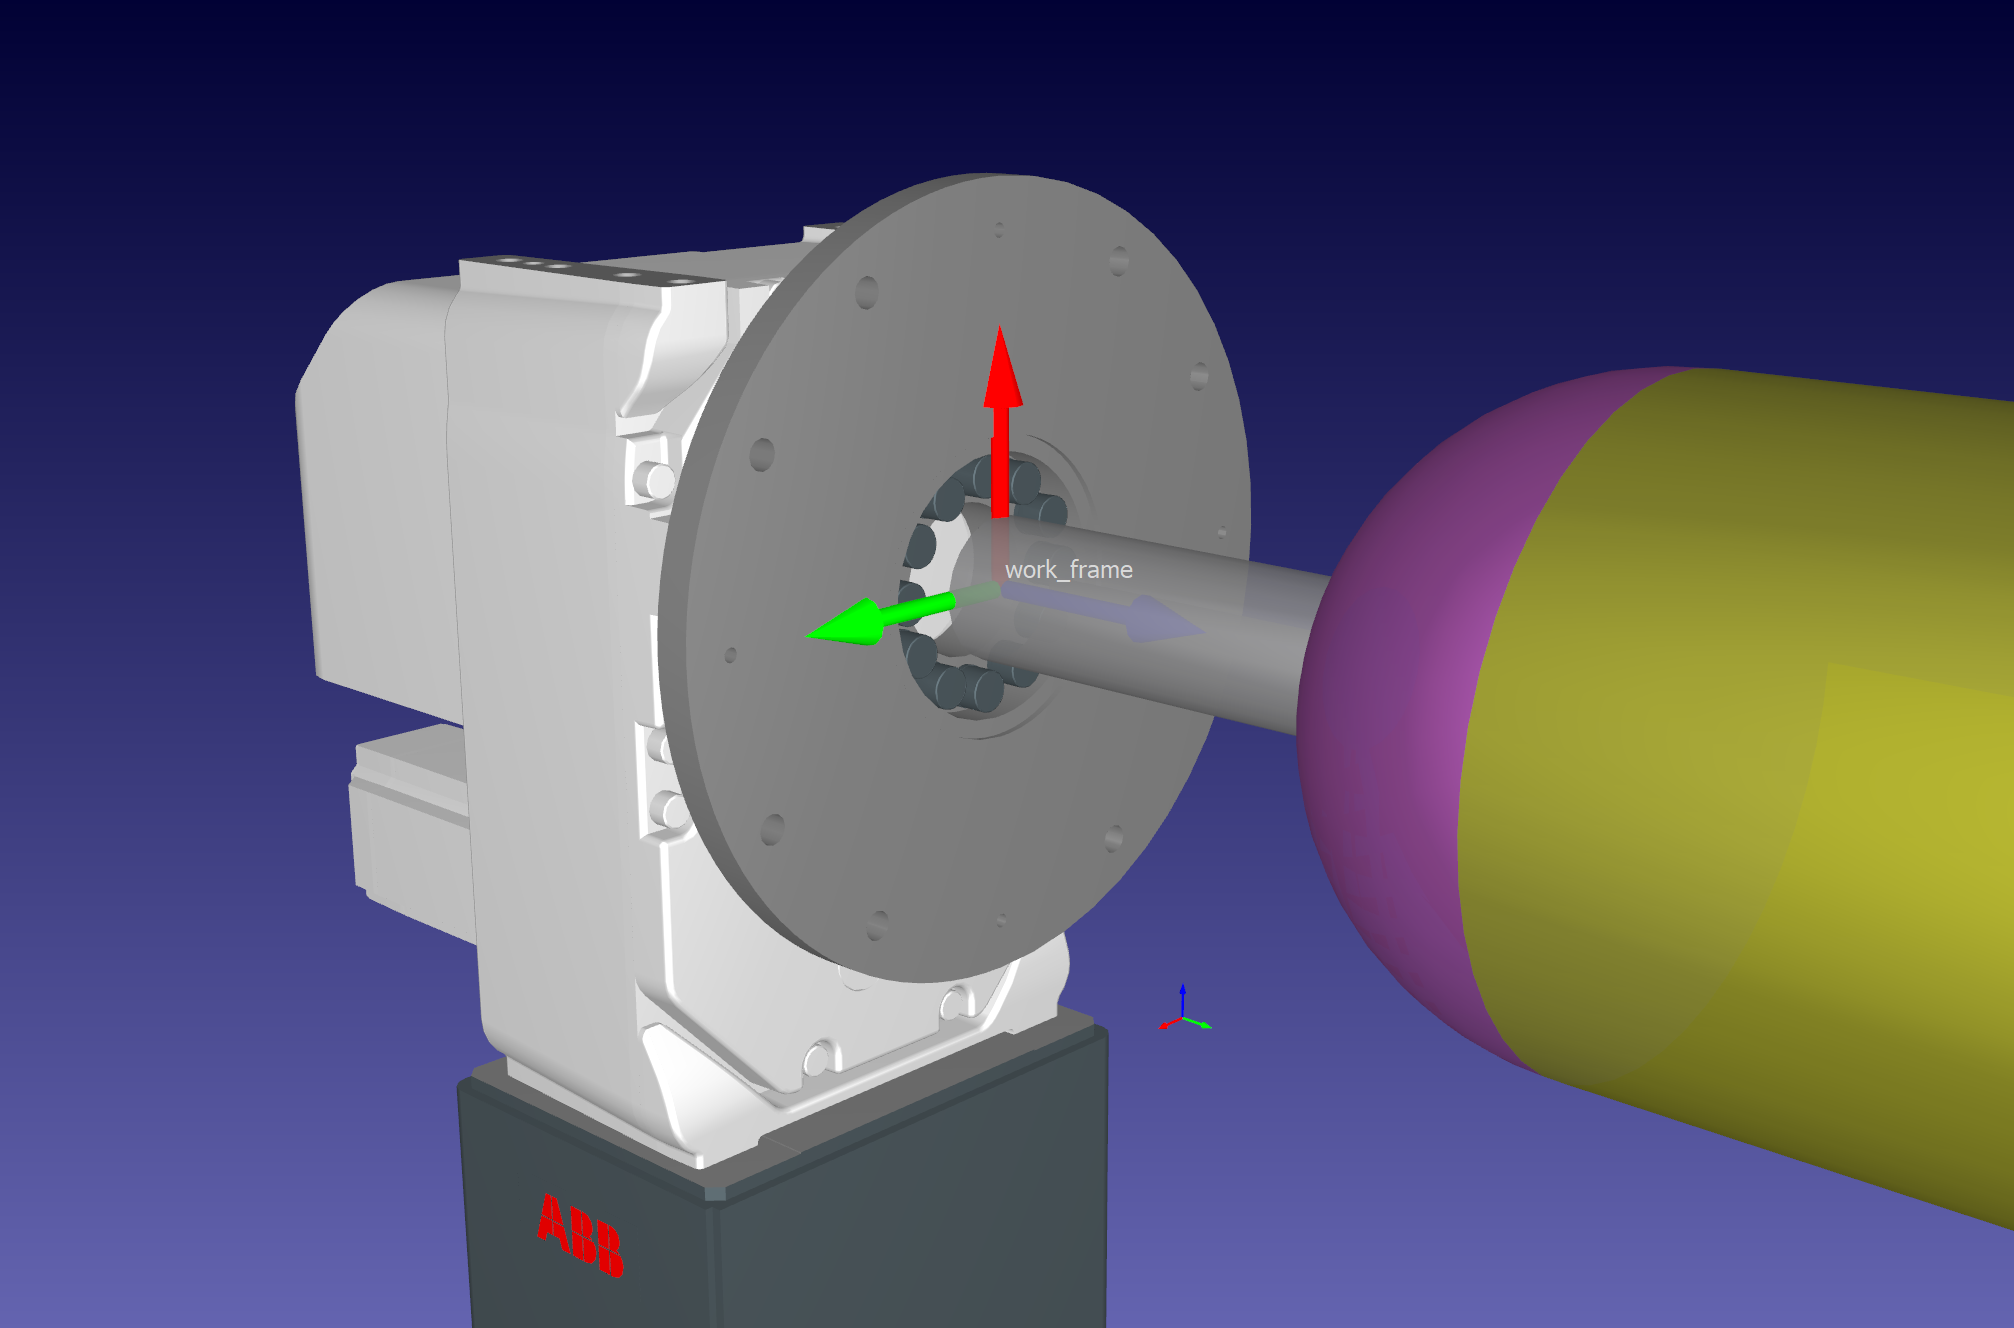
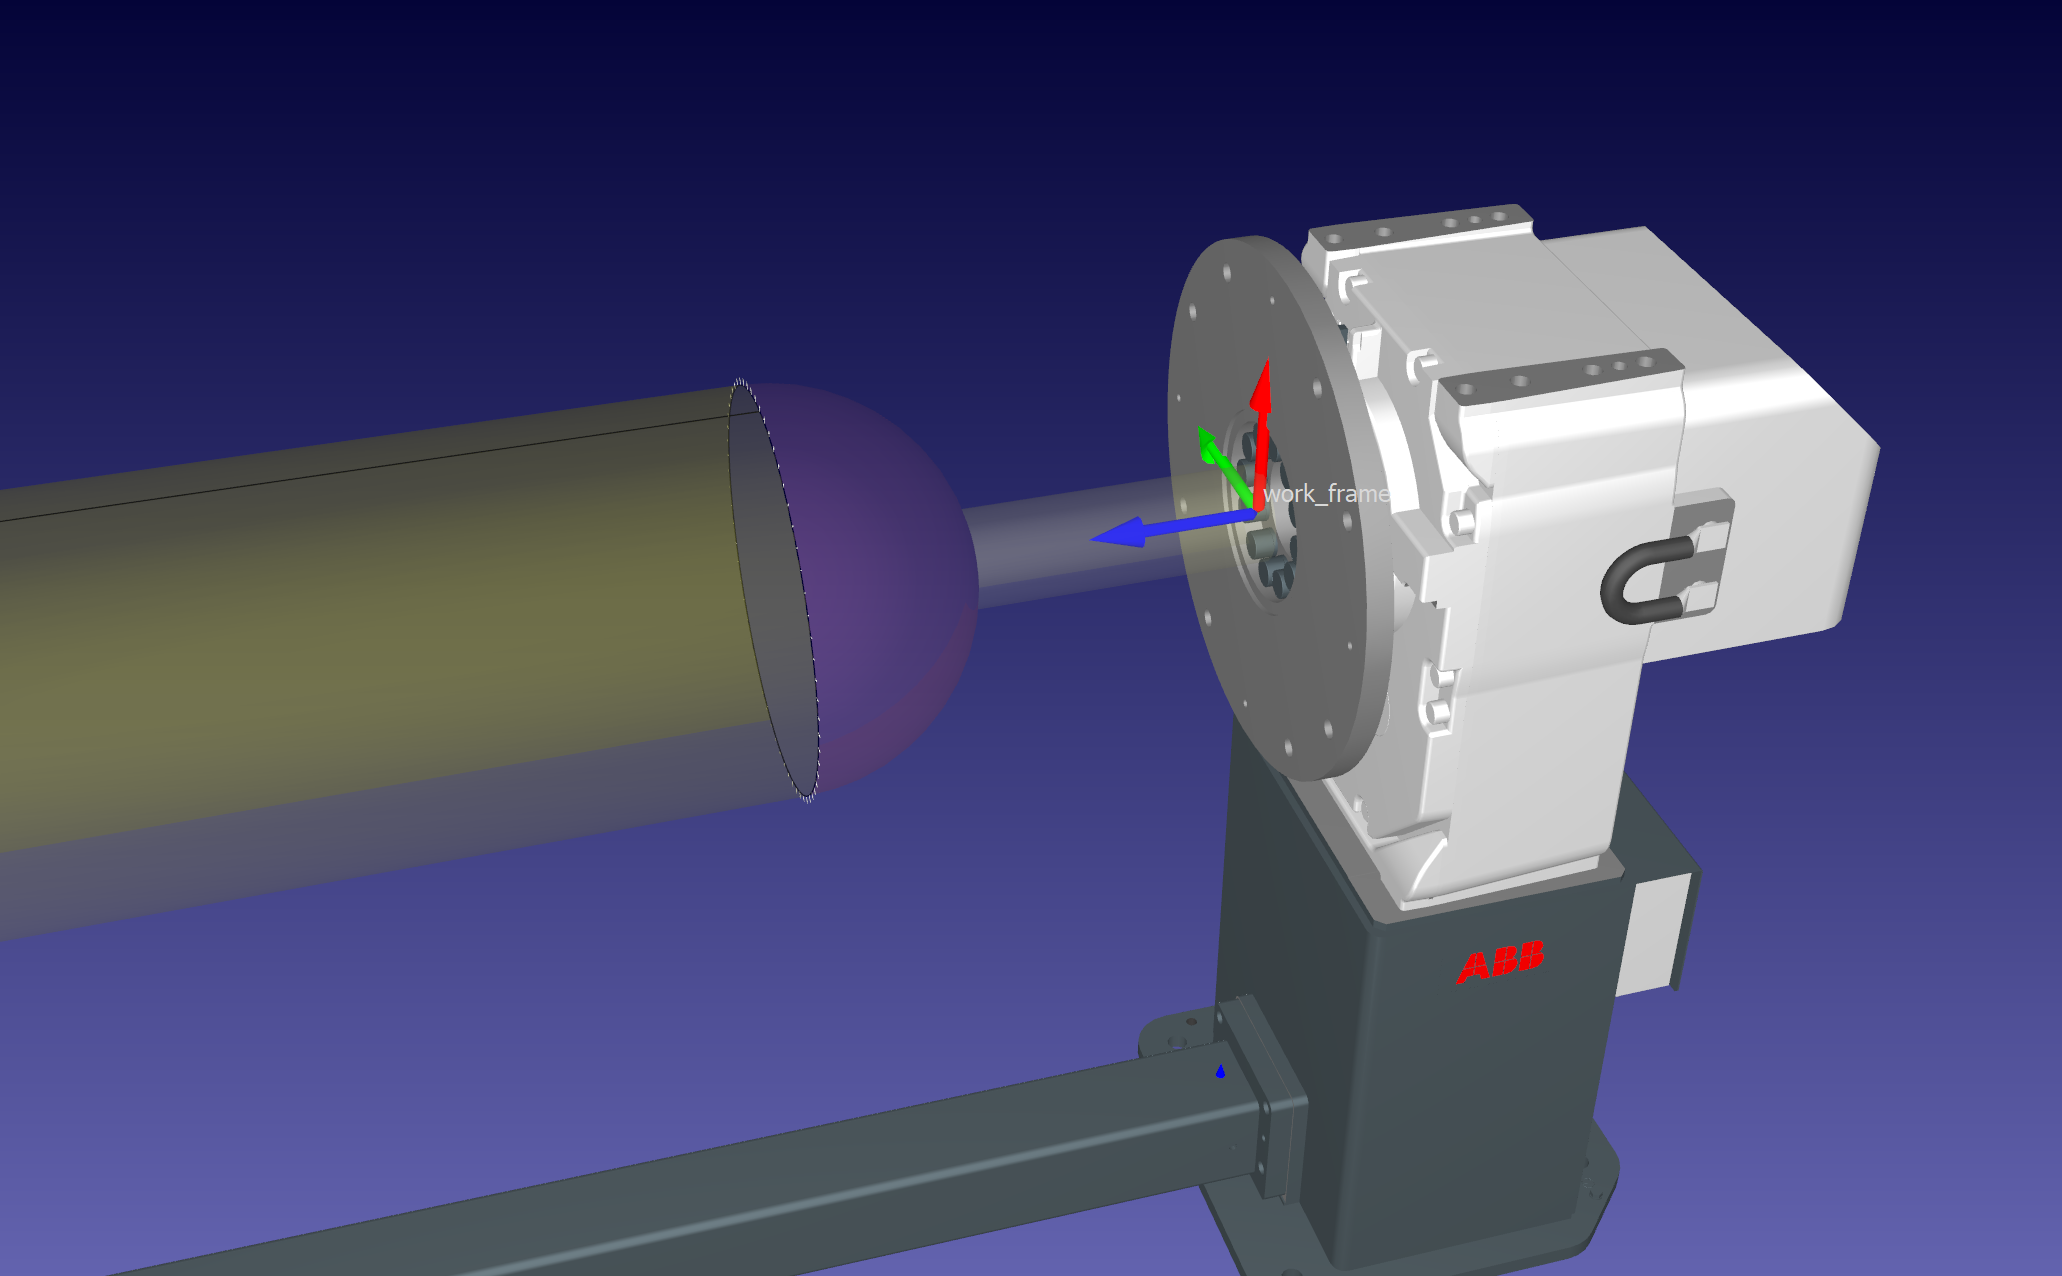
1.Select the positioner flange reference frame for tank attachement in RoboDK.
2.Go to the RoboDK tab in Fusion 360 utilities and select Load Model.
3.Check tank model position and rename it.
Path import
After importing the model, the welding paths need to be imported.
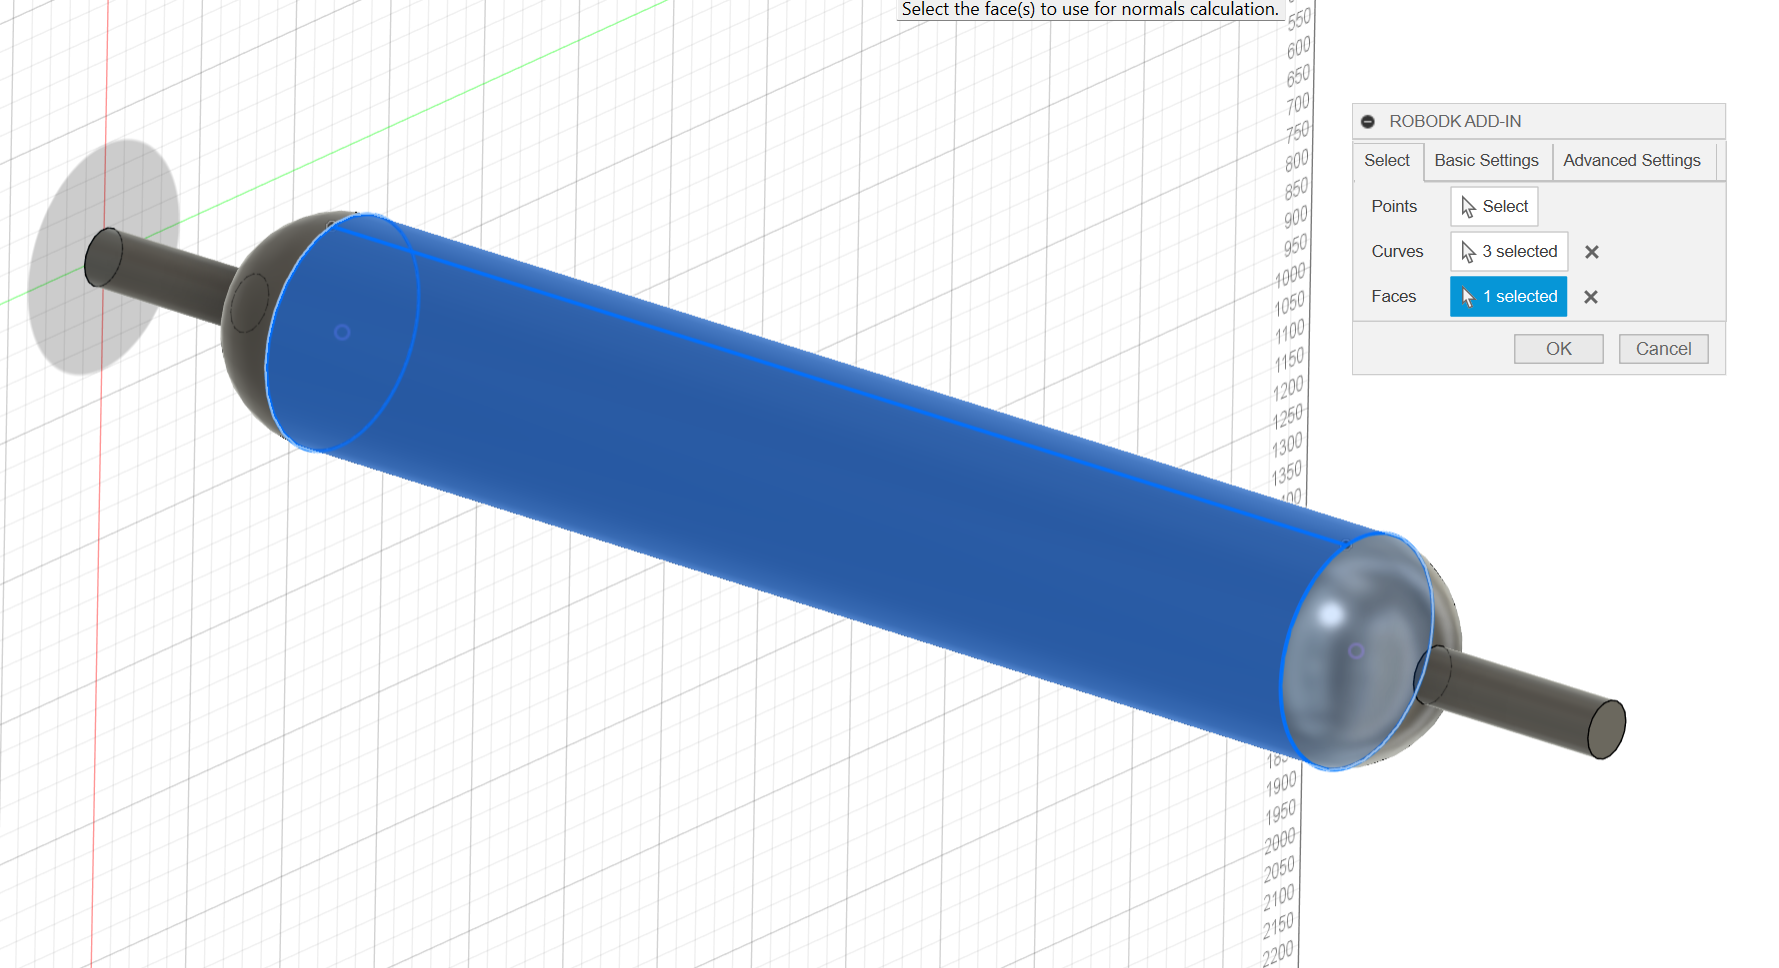
Import the path from Fusion 360:
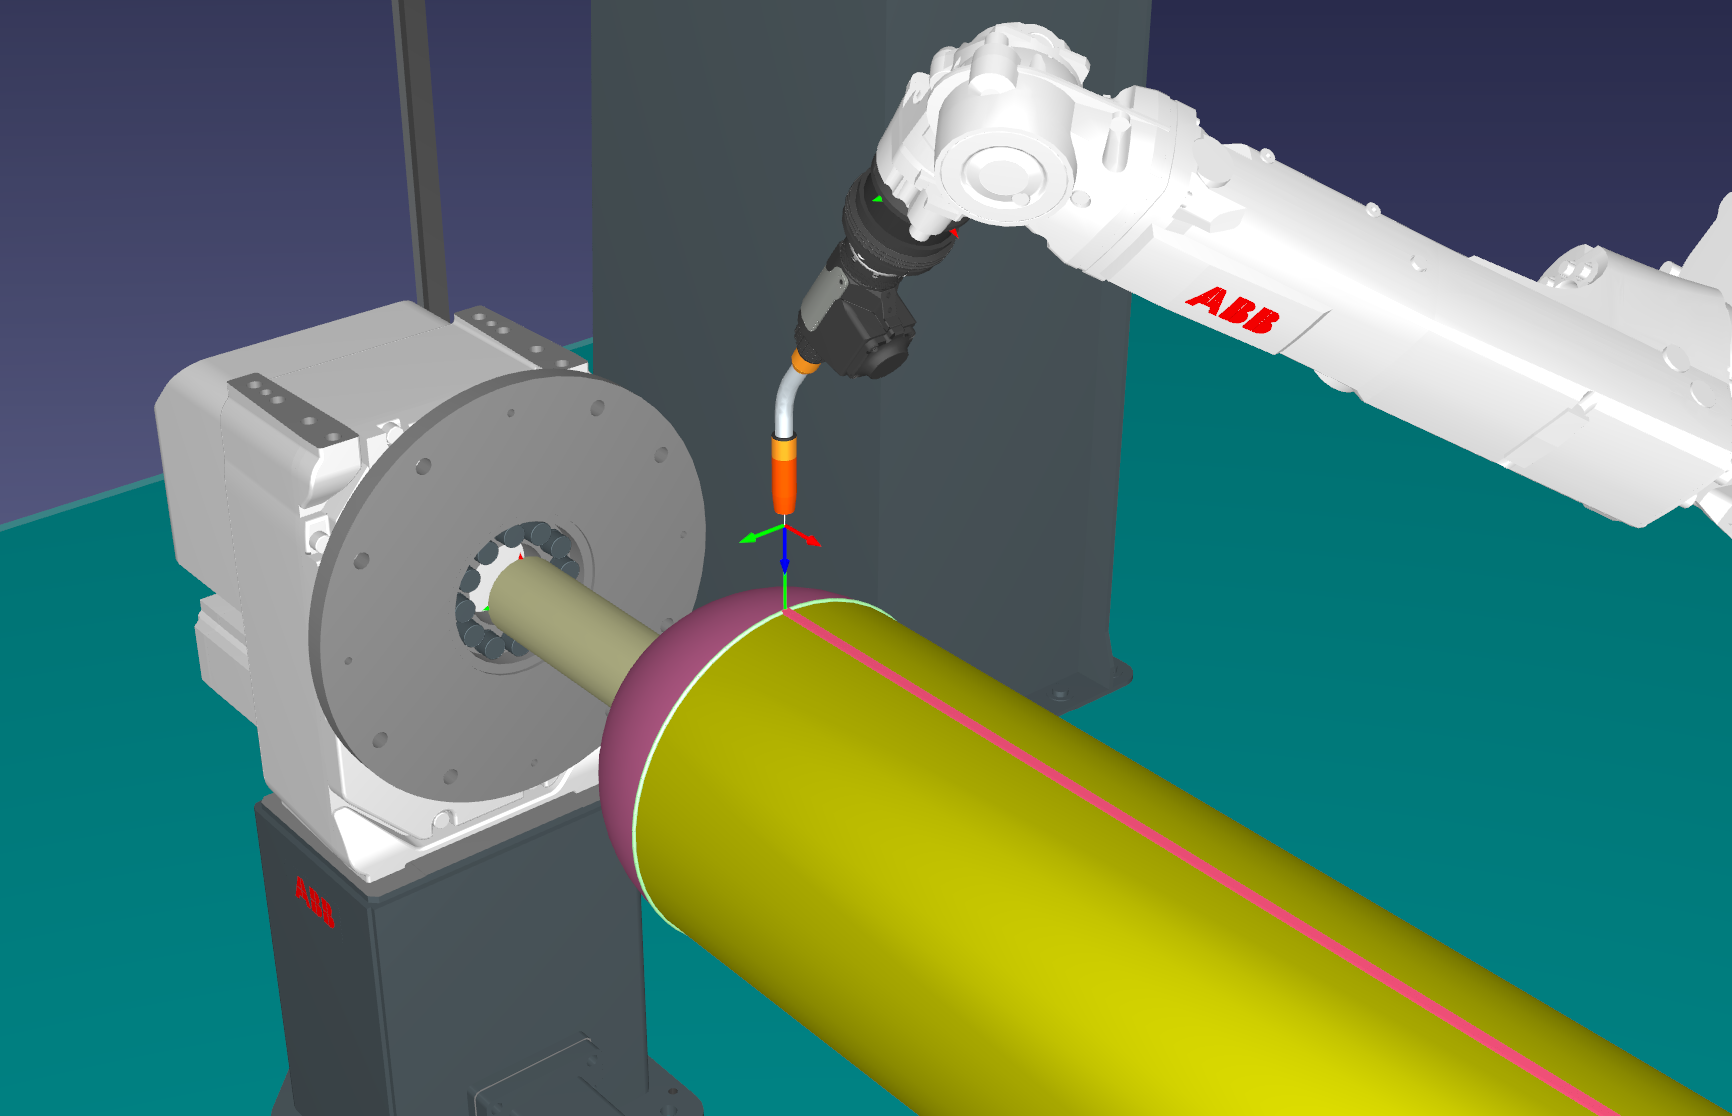
1.Select the welding paths. Make sure to also select the faces as they help orient the robot tool.
2.Now that you have imported the path from Fusion 360, you can go to RoboDK.
3.Check the path position and rename it.
Curve Follow Project setup
After models and welding paths are imported, the next step will be to create the corresponding Curve Follow Projects.
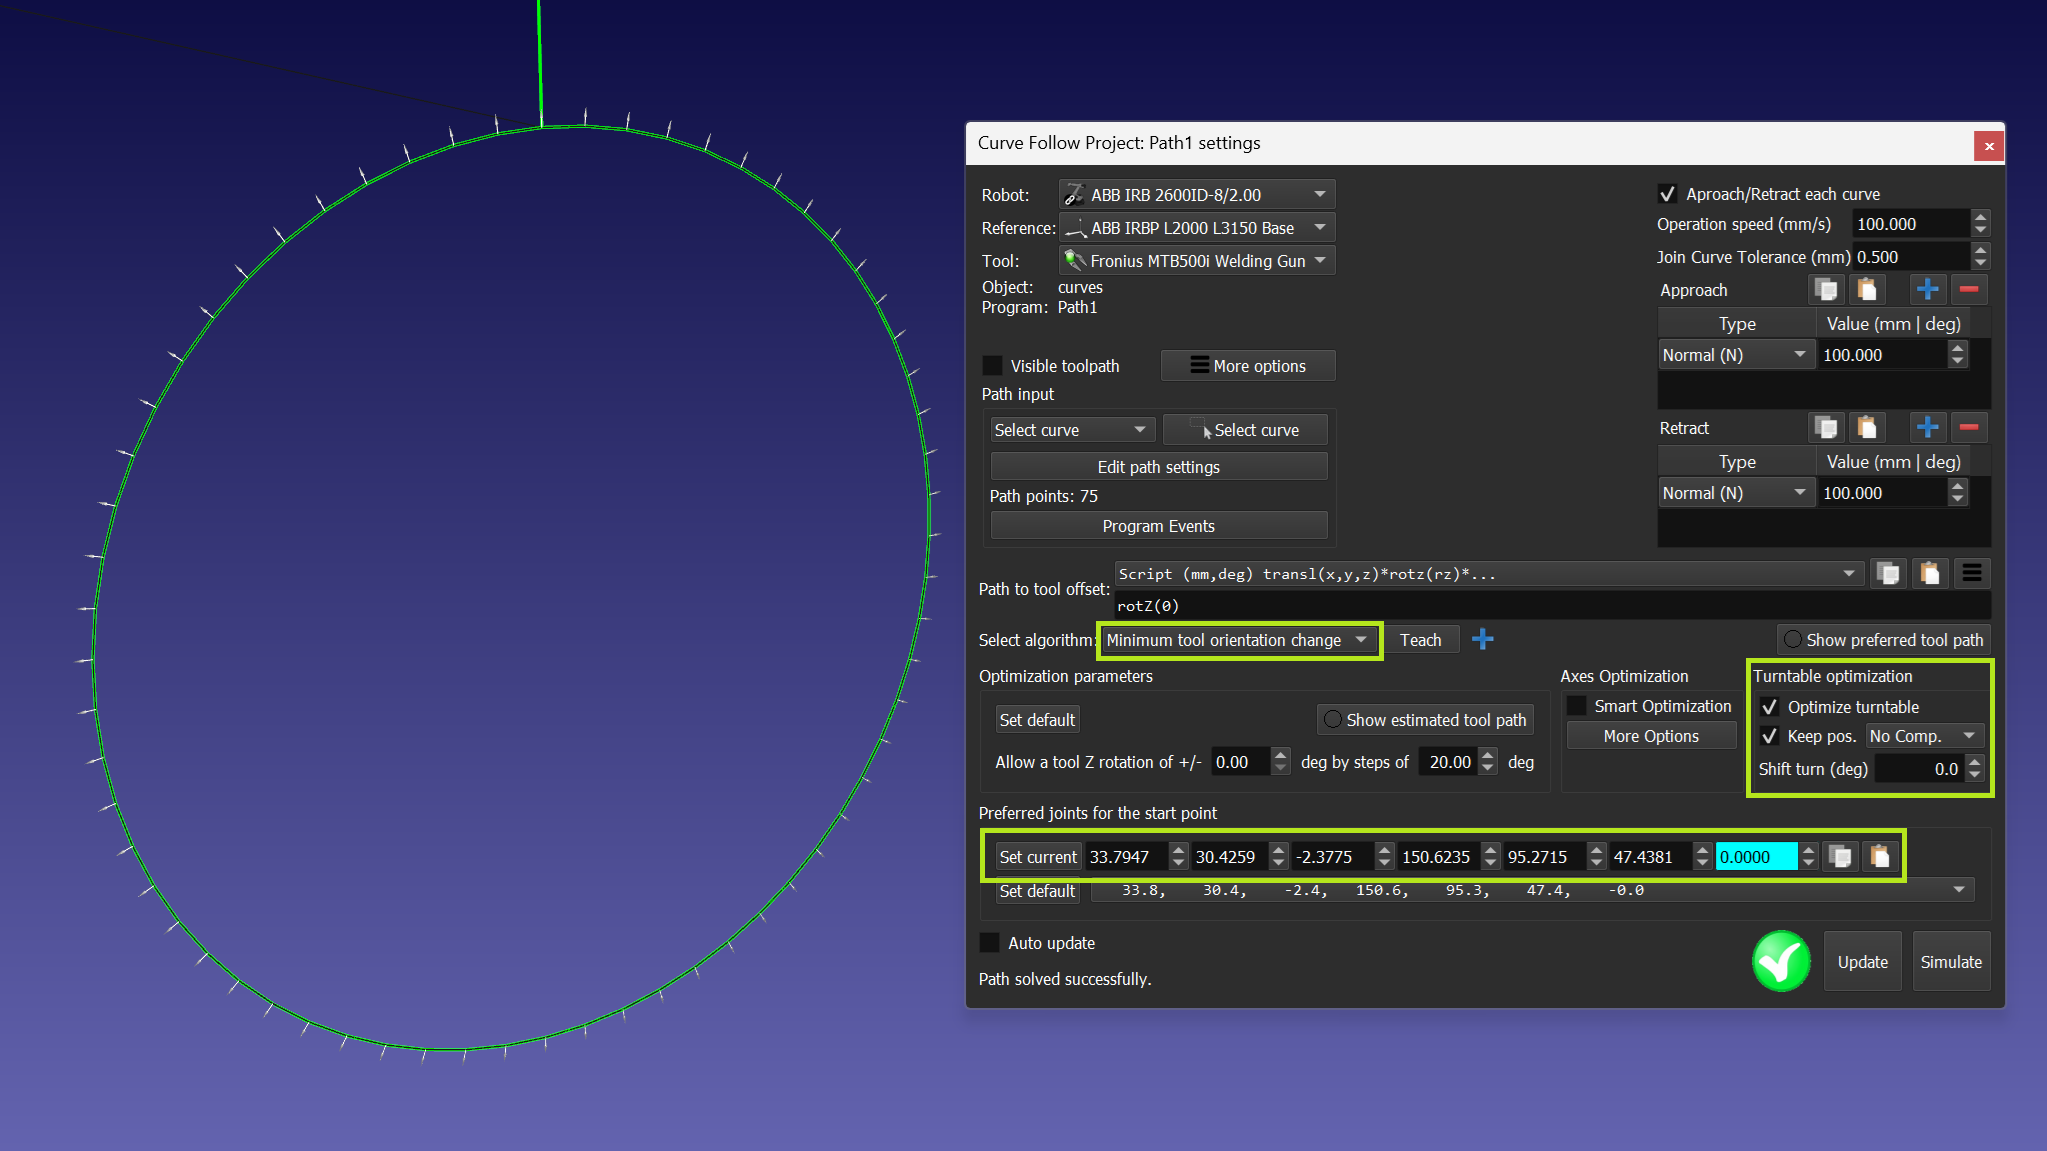
1.Create the new Curve Follow Project (Utilities->Curve Follow Project).
2.Select the first circular curve.
3.Use fixed TCP position without compensation.
4.Set the TCP start point and orientation explicitly.
5.Create the new Curve Follow Project (Utilities->Curve Follow Project) for a straight seam.
6.Exclude the use of positioner rotation and explicitly set the end point of the previous trajectory as the start of the new one.
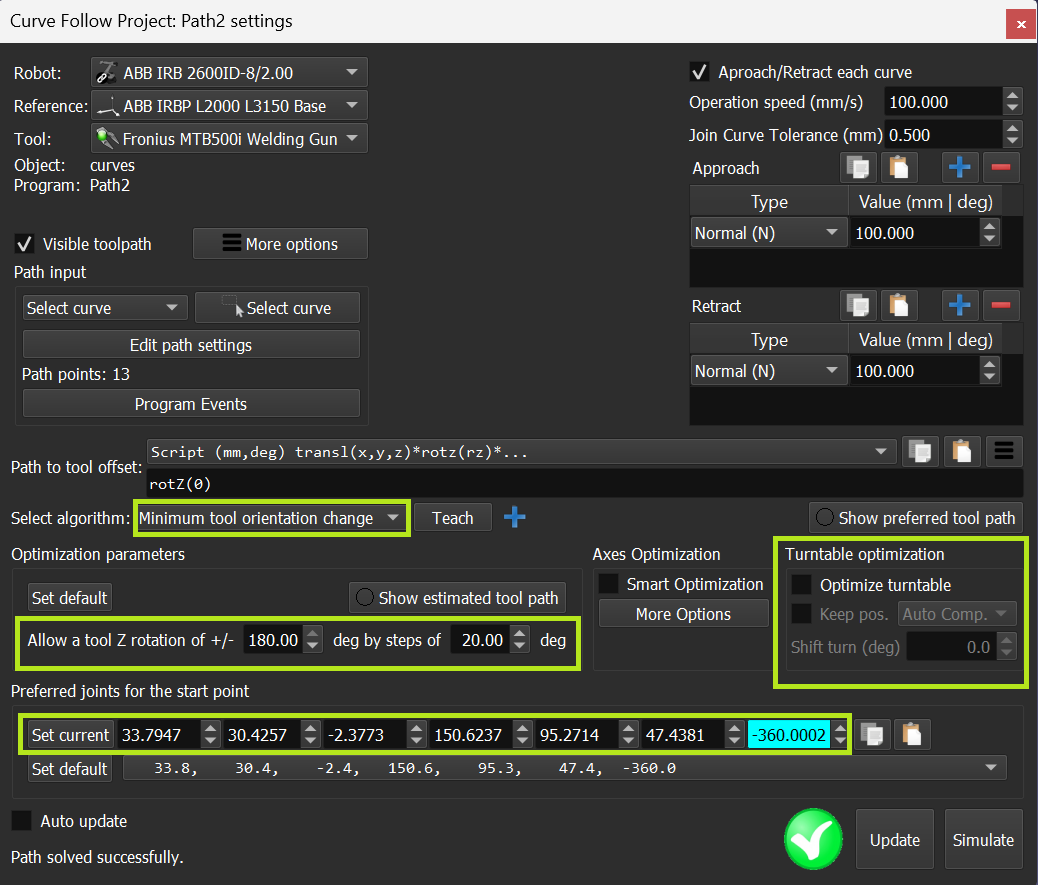
7.Create a trajectory for the second circular seam and use the same settings as for the first one.
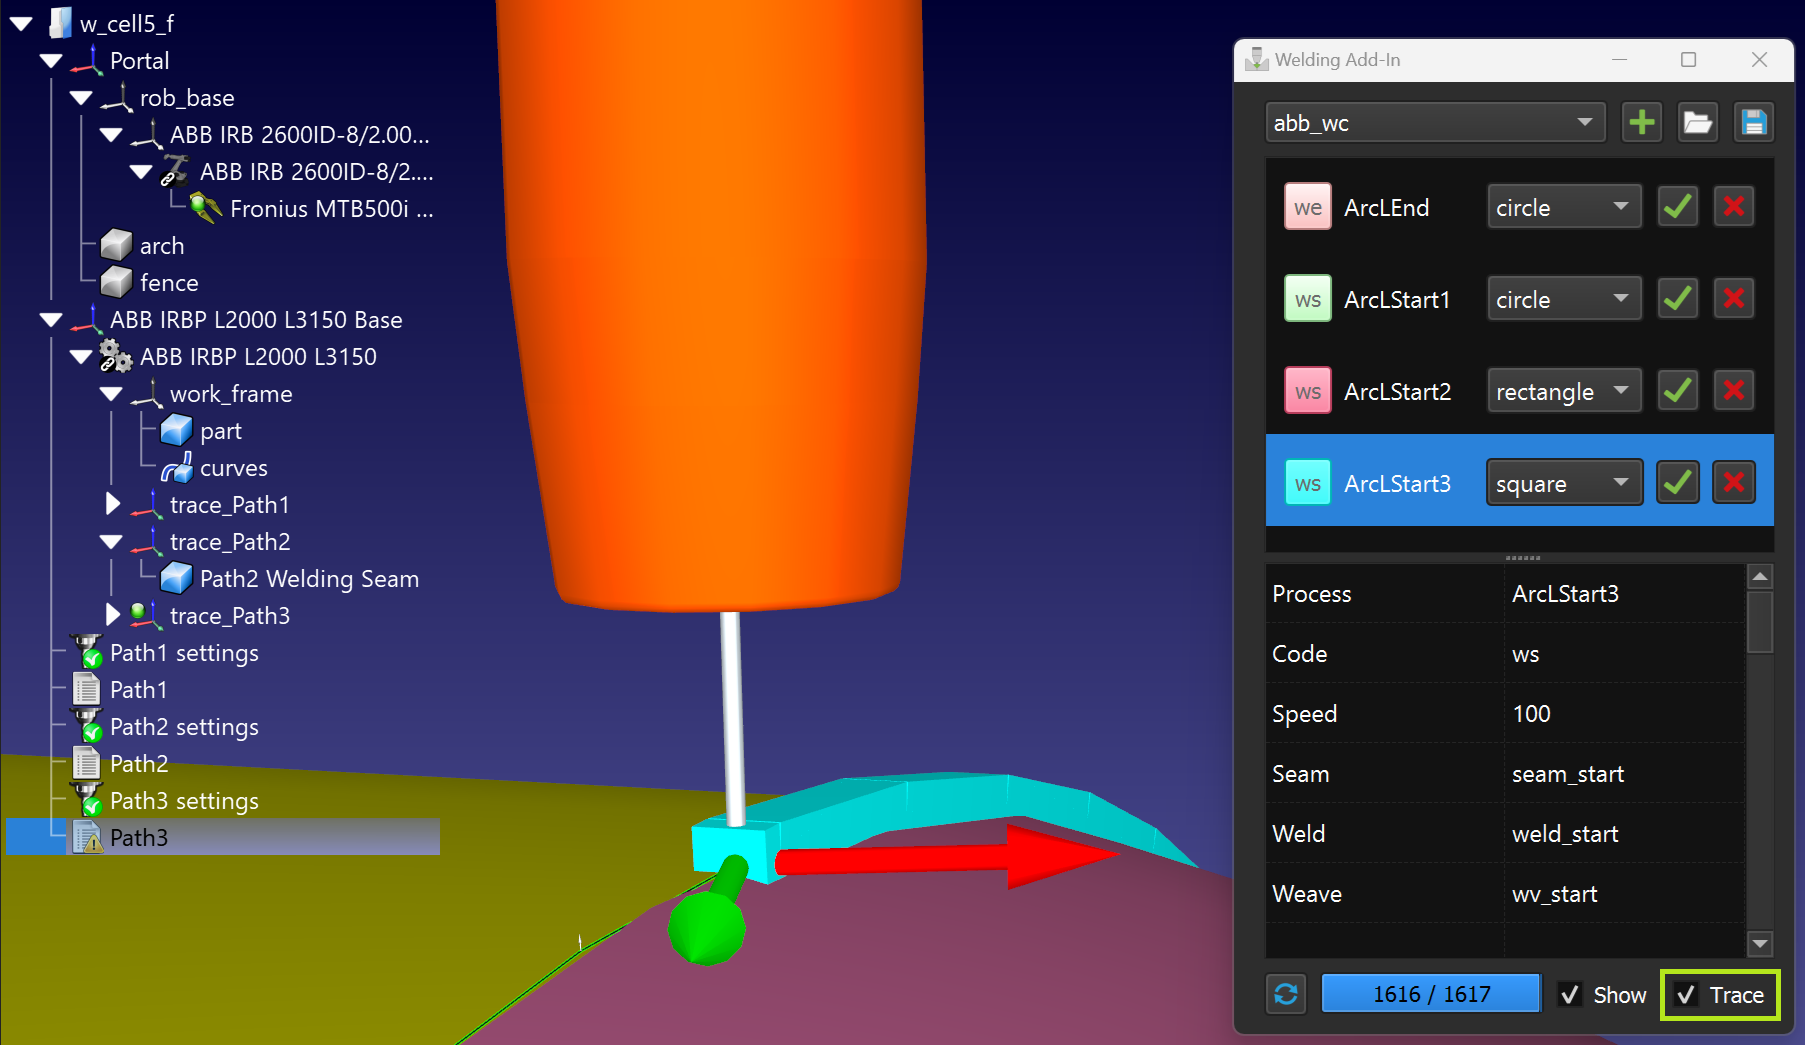
Welding Add-in usage
In this section you will learn how to apply Welding Add-in and customize each welding operation. We will use the templates for the welding instructions of the ABB robots.
1.Start the Welding Add-in and sequently add the necessary welding modes that we're going to use.
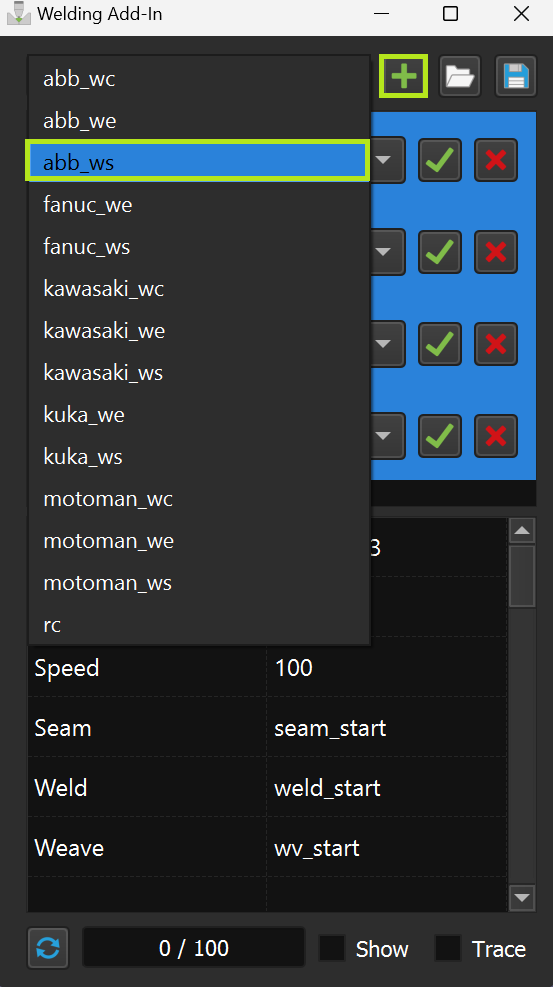
2.Change the names of the modes as they should be different and set the parameters.
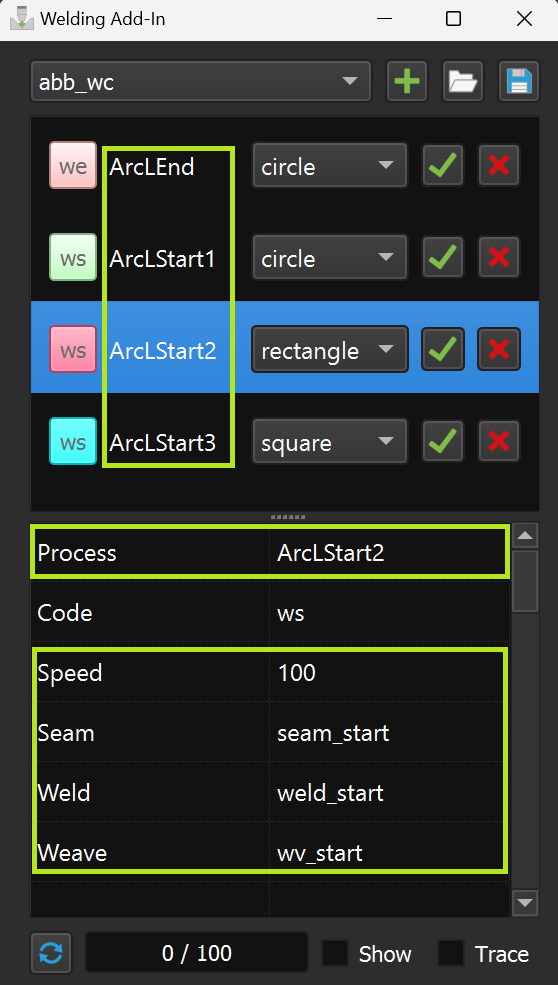
3.For each of the Curve Follow Projects select and apply instructions for the welding start and welding end (using Ctrl button).
Please, pay attention to selection sequence on the screenshot below.
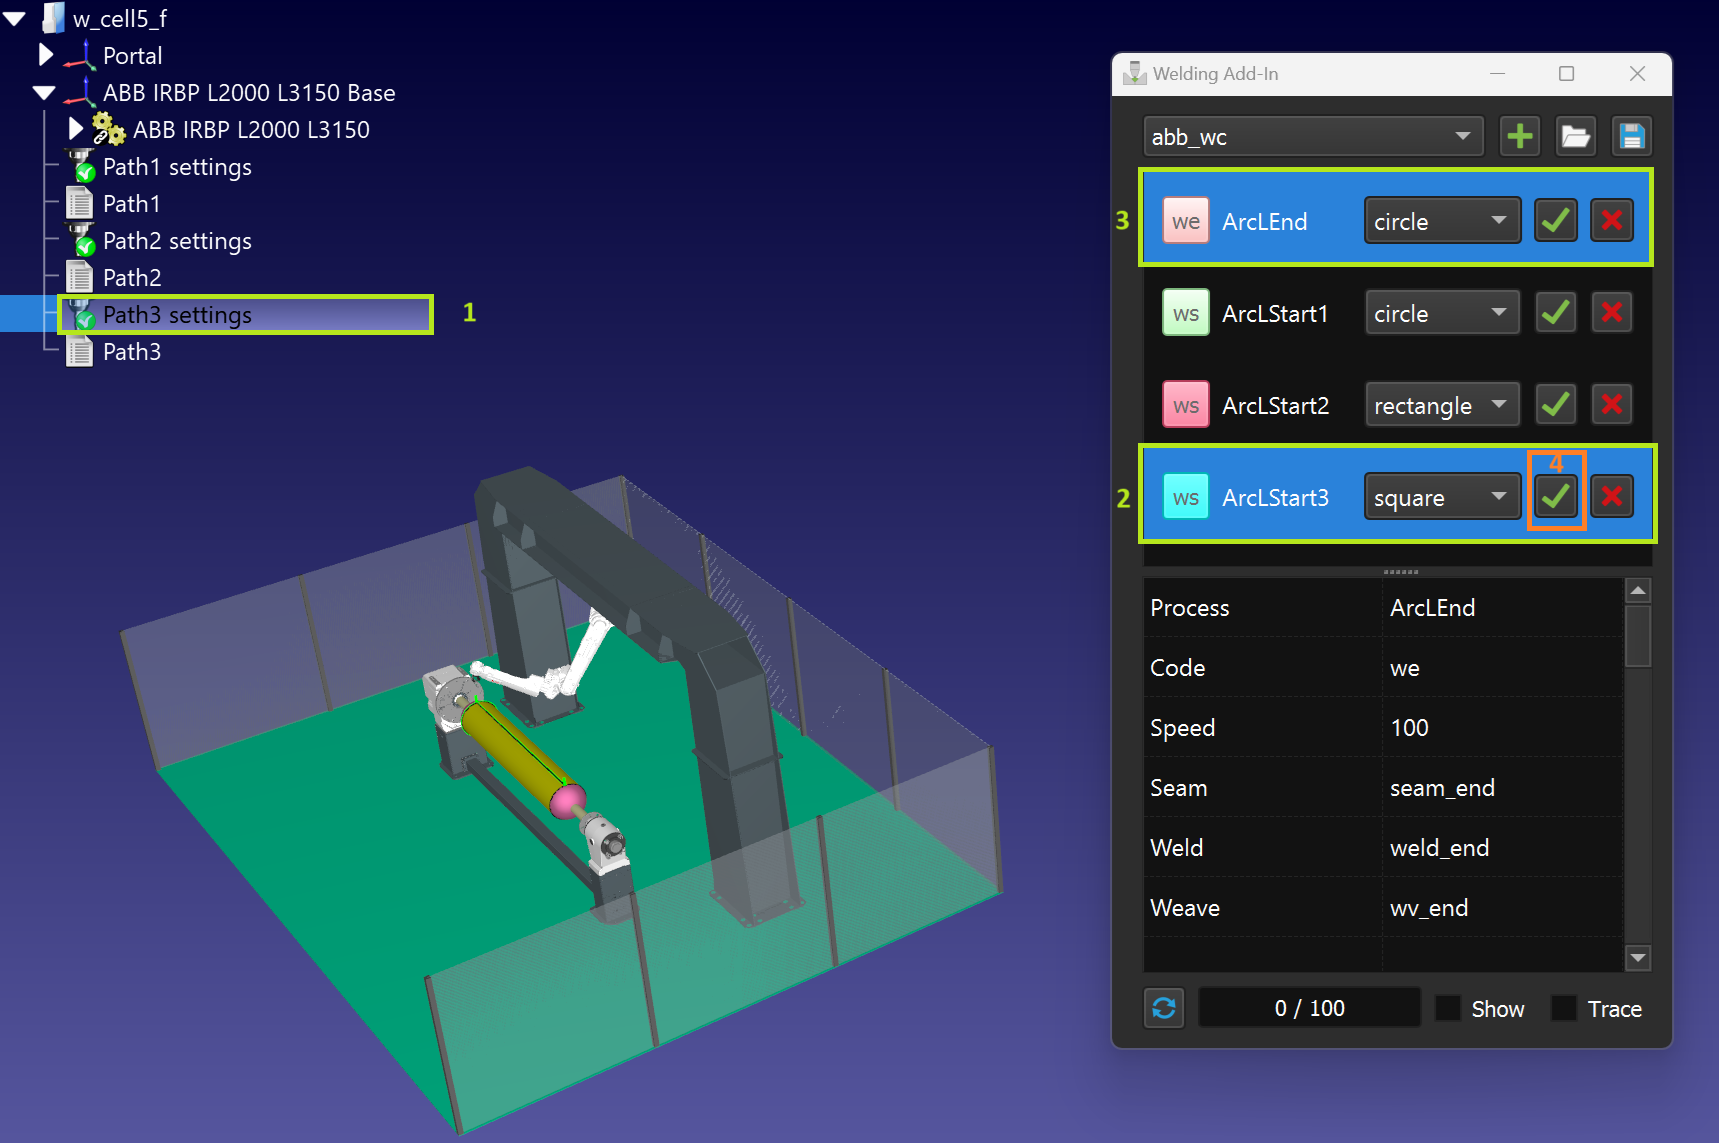
4.Select the appropriate Curve Follow Projects and press keyboard shortcut Ctrl + U for update.
5.You can build a visualization for welding trajectories.
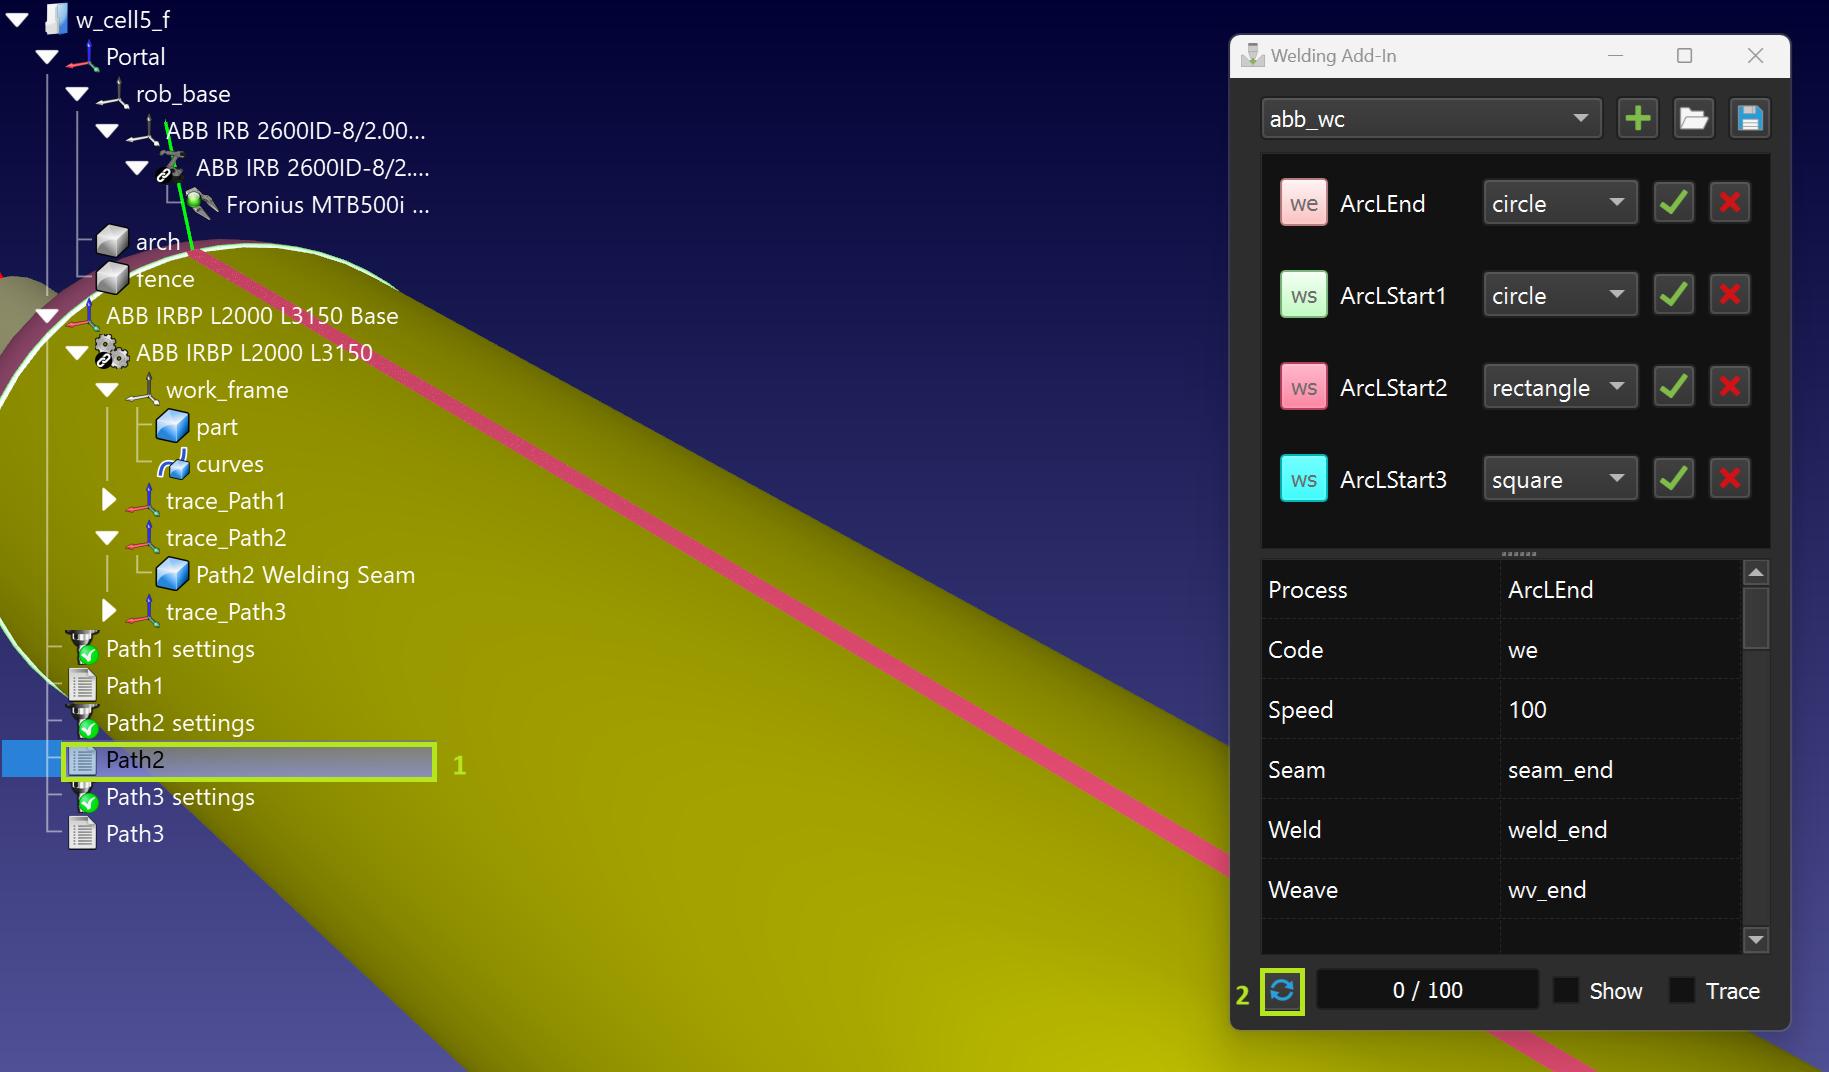
6.Use the trace check box to evaluate how the weld material is applied as the program executes.
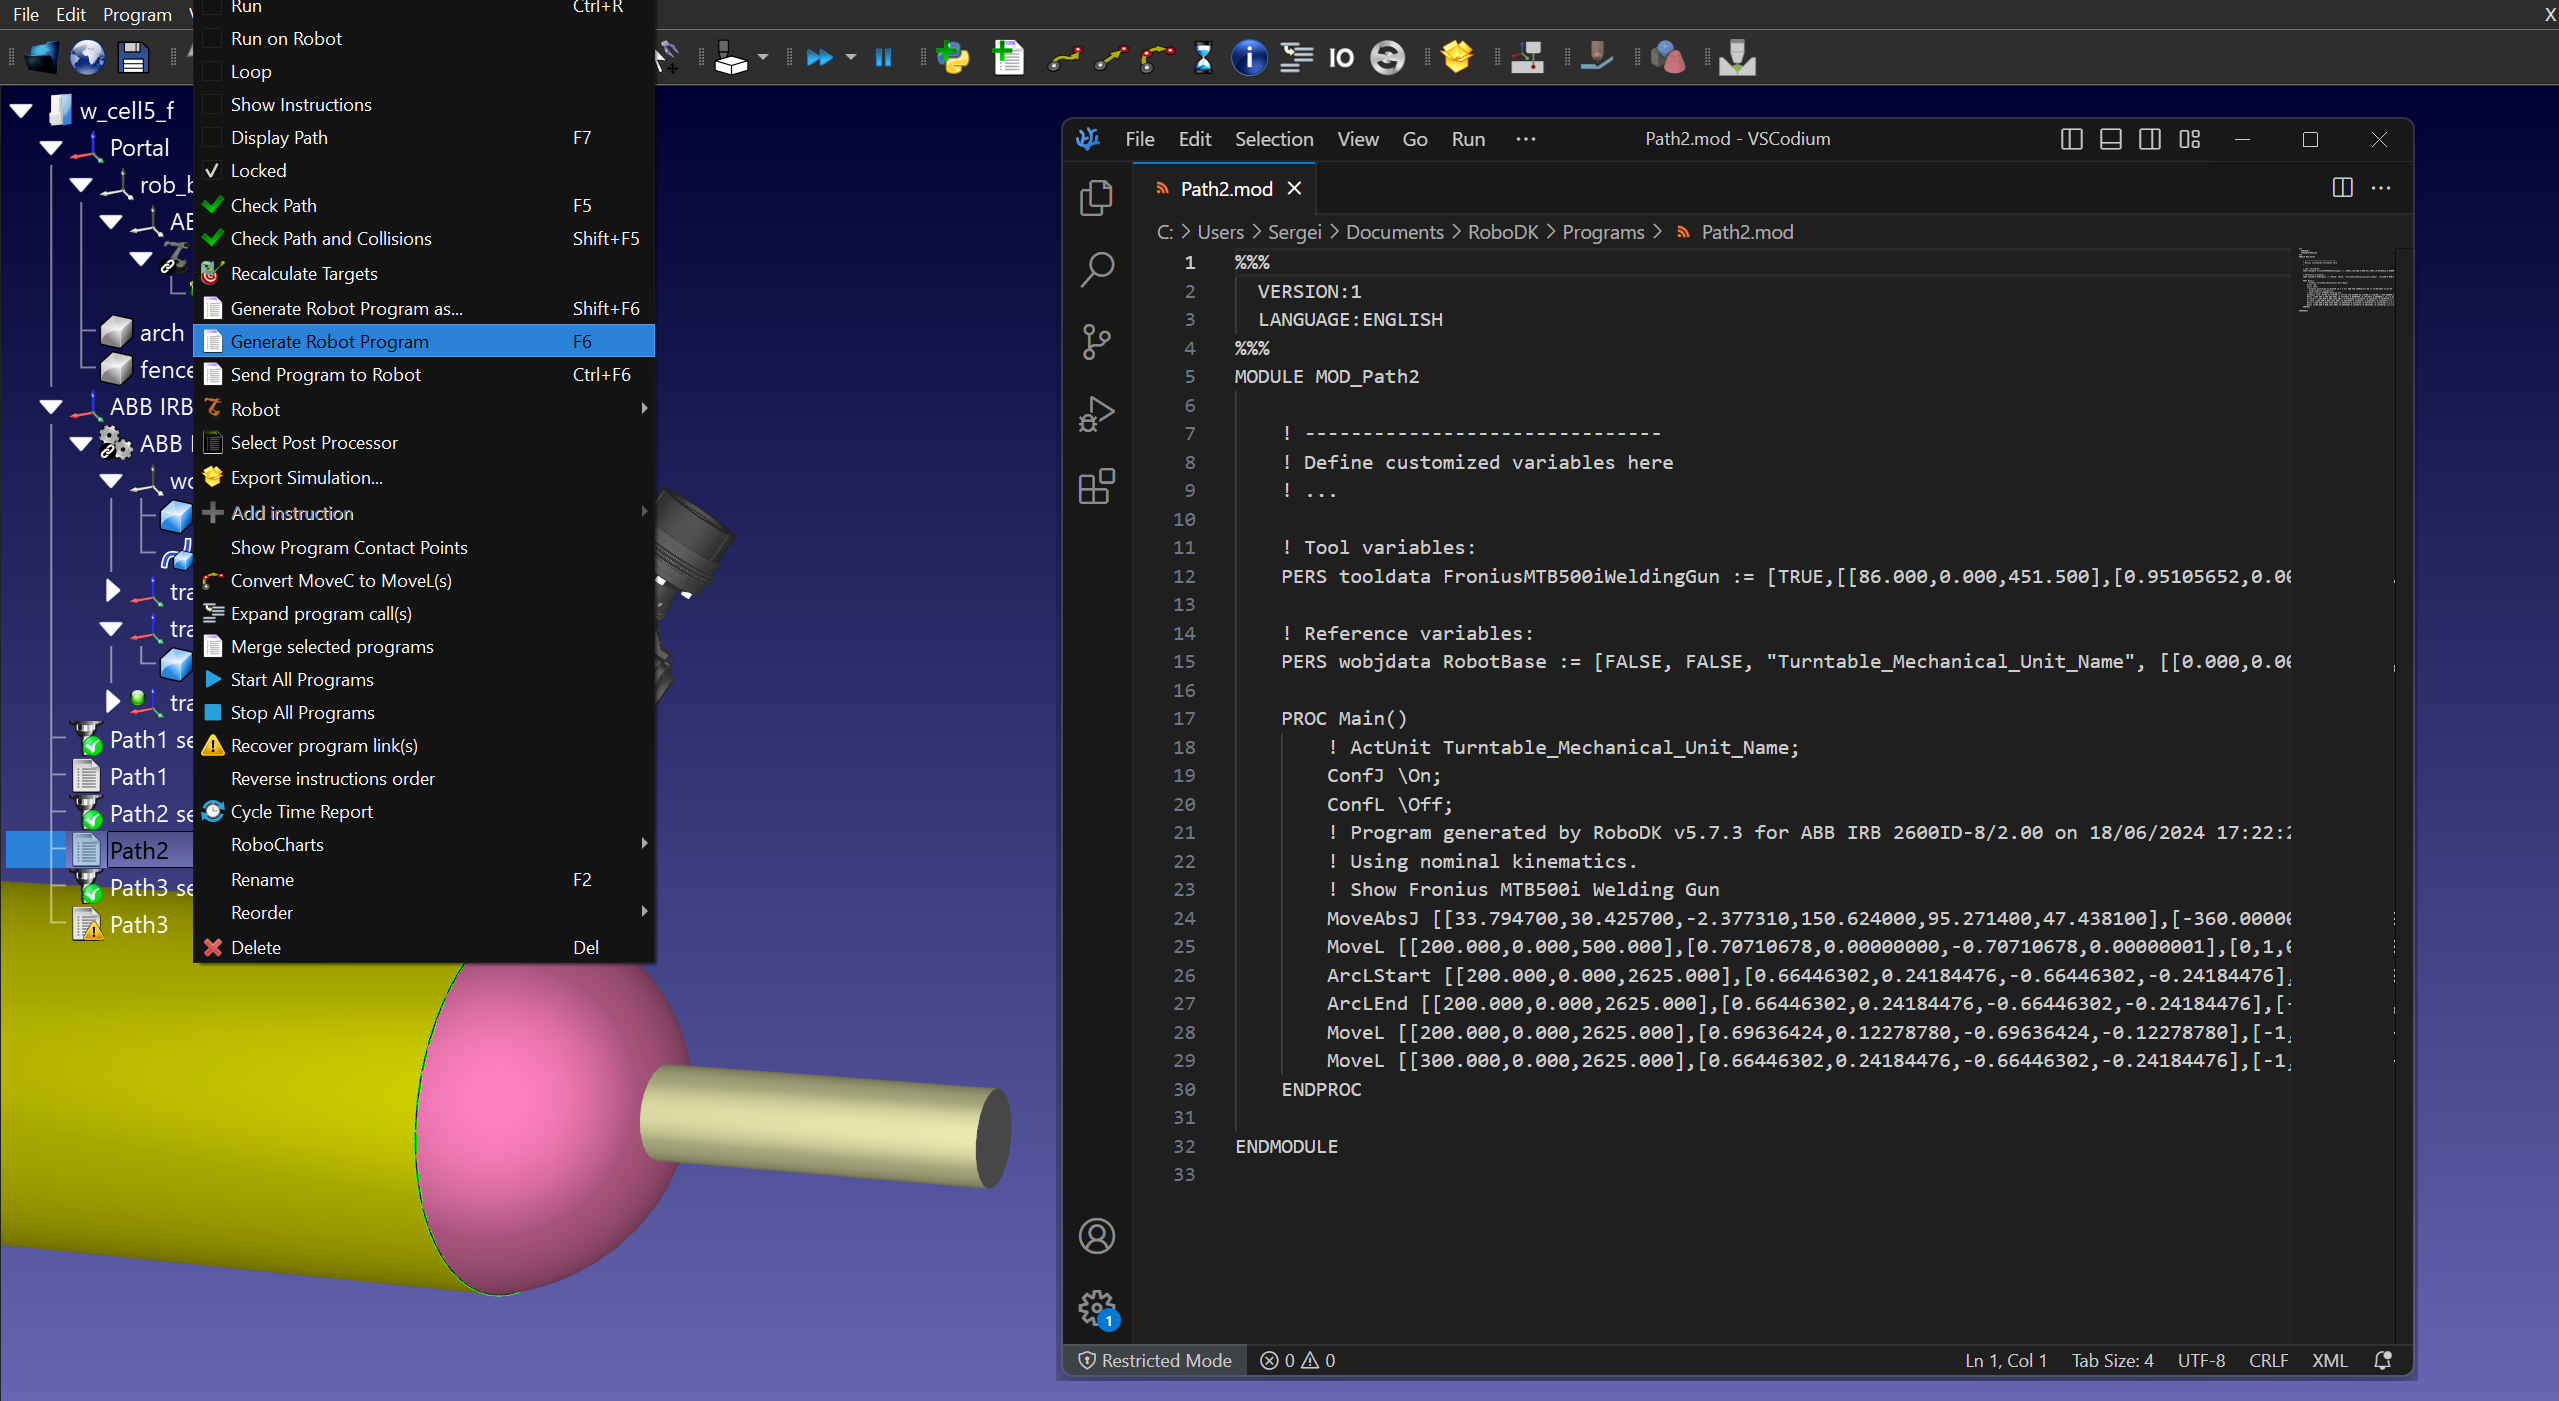
Program generation
Choose a suitable postprocessor and check the generated program with welding commands: